This Rag Quilt Flag Pillow is my newest pillow.
And I do mean mine. I created this one just for me!
So often, the pillows I make are for others. But not this time.
This one's staying here! (attention daughters: hear that girls?)
If you follow me on Pinterest...
and if not, I'd love for you to 
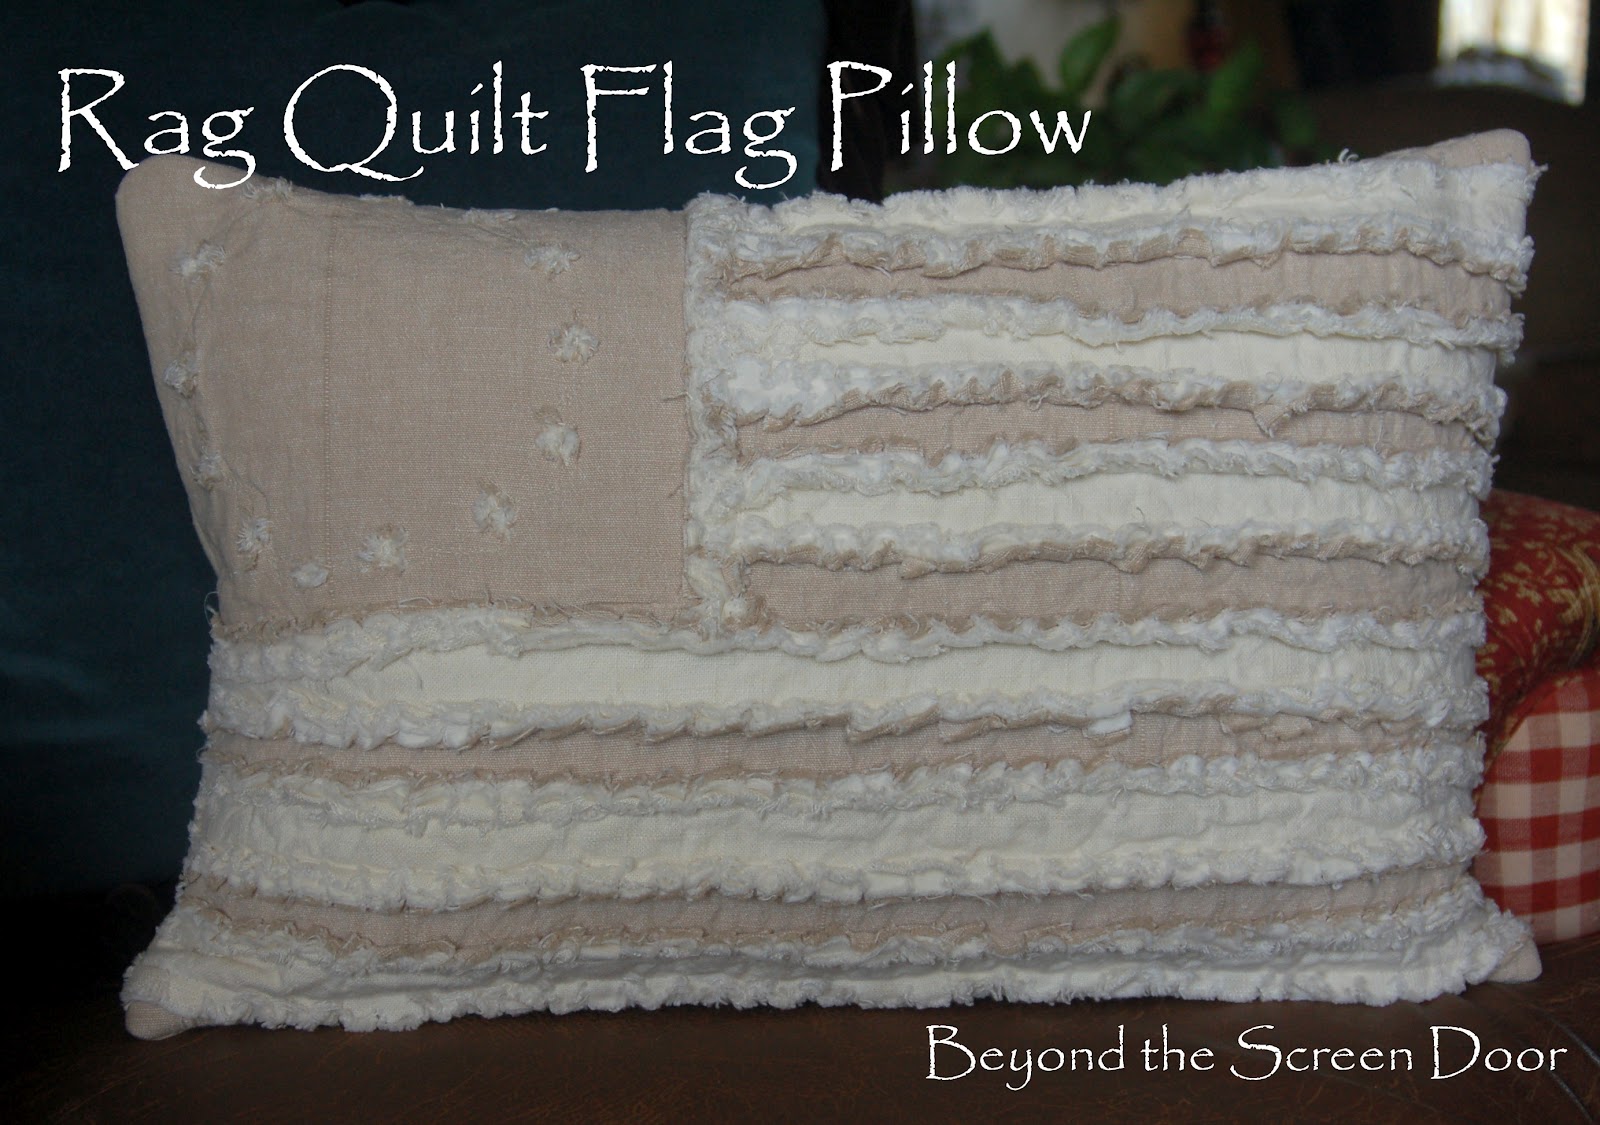
...you may have seen the rag quilt ideas I pinned onto my Project Ideas Board. The initial inspiration for the rag quilt concept came from Northern Cottage blog. I combined this concept with the desire to make a flag pillow and the result is the
Betsy Ross inspired Rag Quilt Flag Pillow!
Today, I'm going to share all the how-to's so you can make your own flag pillow! Or if sewing is not your thing, hop on over to The Shop to purchase one!
The Betsy Ross pillow consists of 13 stripes and stars. So the first and most tedious part is cutting the strips of fabric.
You'll need 1/2 yd each of three fabrics for the face of your pillow. An ivory cotton, a taupe cotton and a flannel or cotton batting used for quilts. (Because I have it on hand, I used a flannel backed lining which I use for window treatments instead of the cotton batting.)
6 @ 2.25" x 24" ivory strips
7 @ 2.25" x 24" taupe strips
13 @ 2.25" x 24" cotton batting strips
taupe fabric for the back side of pillow
*3 @ 10"w x 9"h piece - 1 from each ivory, taupe and batting fabric
*1 extra 10"x9" piece in ivory
*I suggest waiting to cut these pieces until you are ready to sew them in place. I'll explain later.

The batting or flannel will line each piece of fabric.
Begin by paring up one strip of lining with one strip of fabric.
One tricky aspect in sewing a rag quilt is the seam allowance side is actually the front of your quilt. This is often easier said than done.
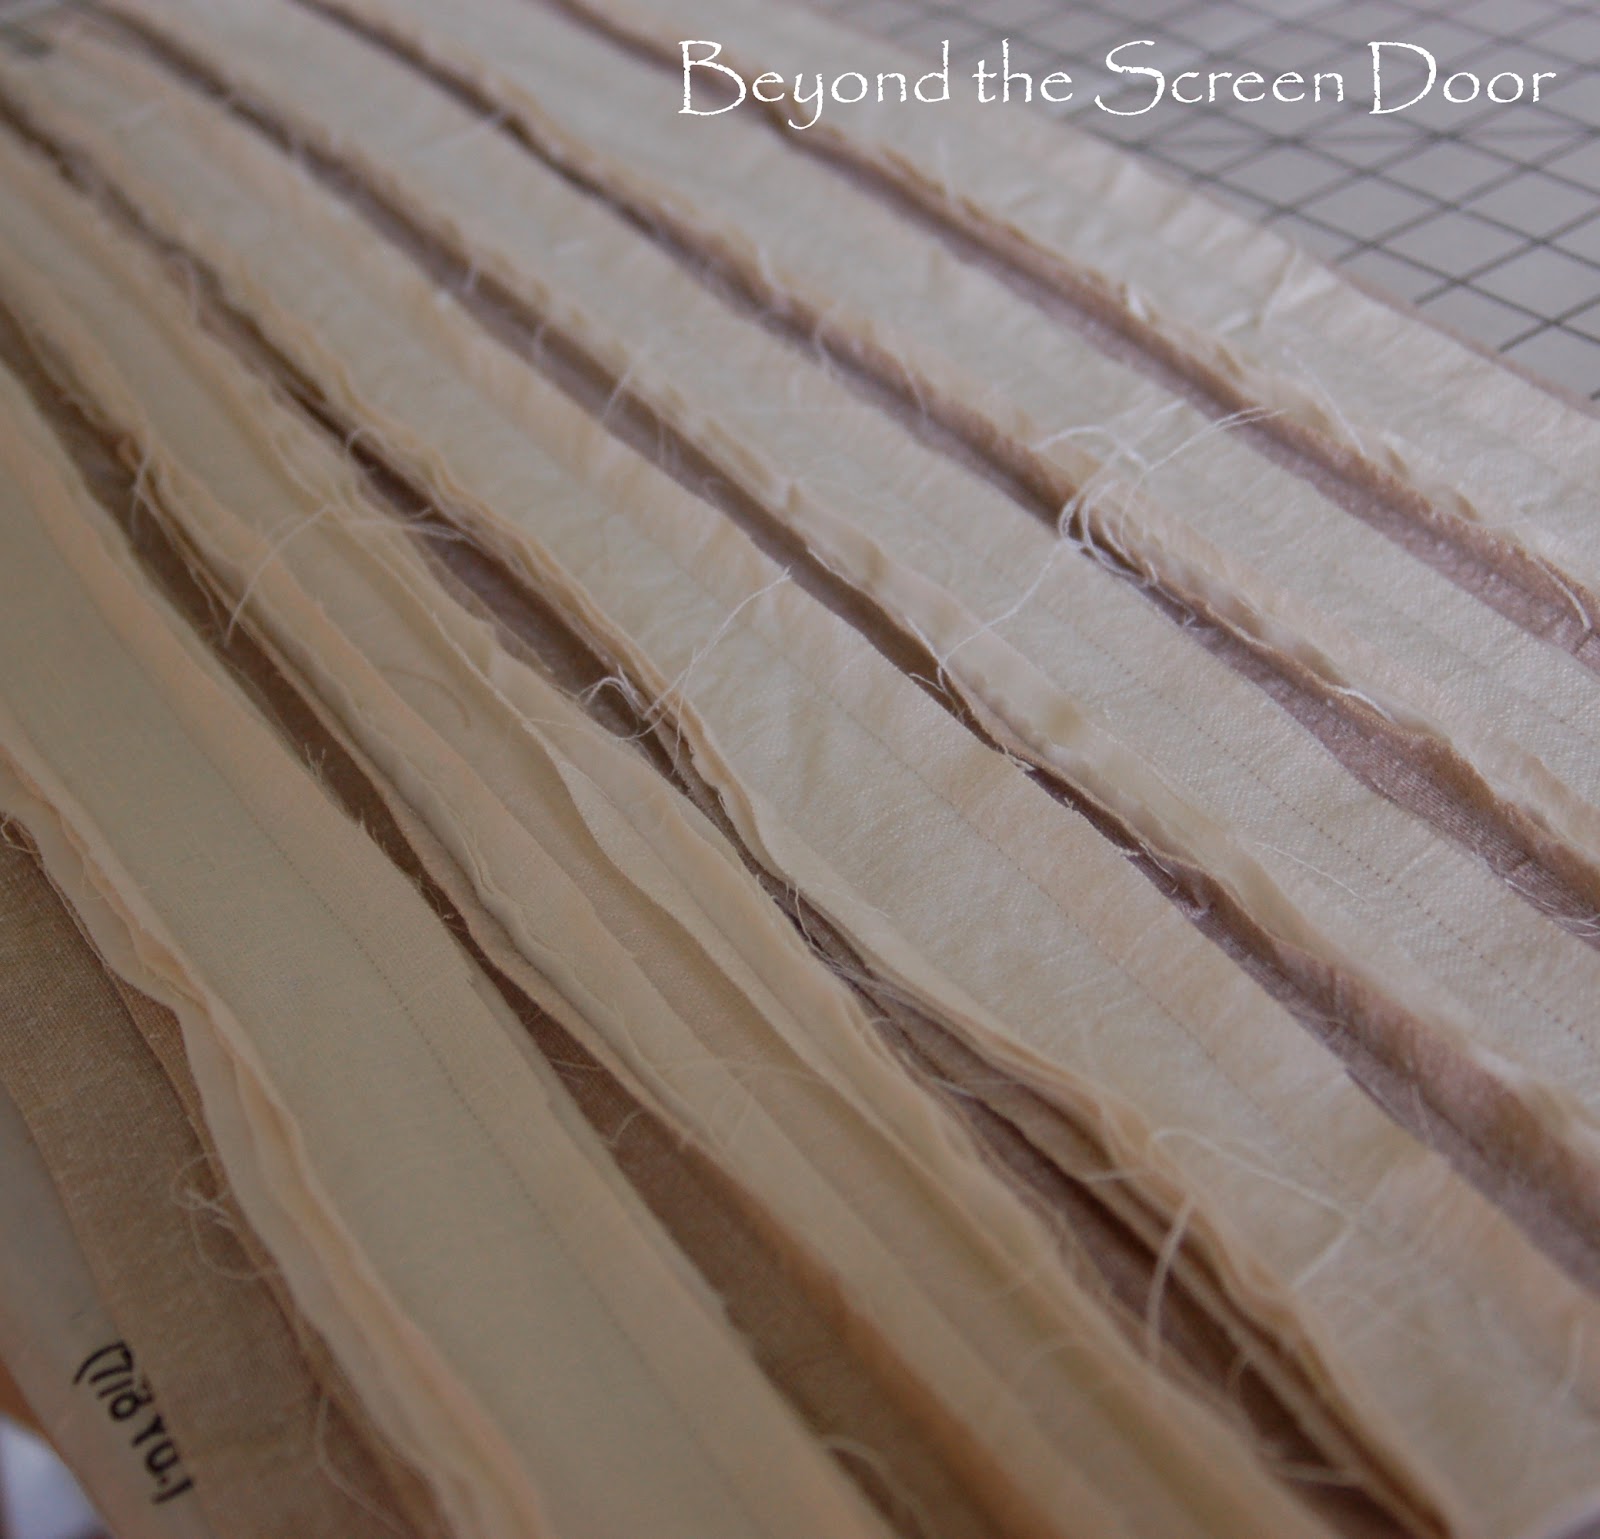
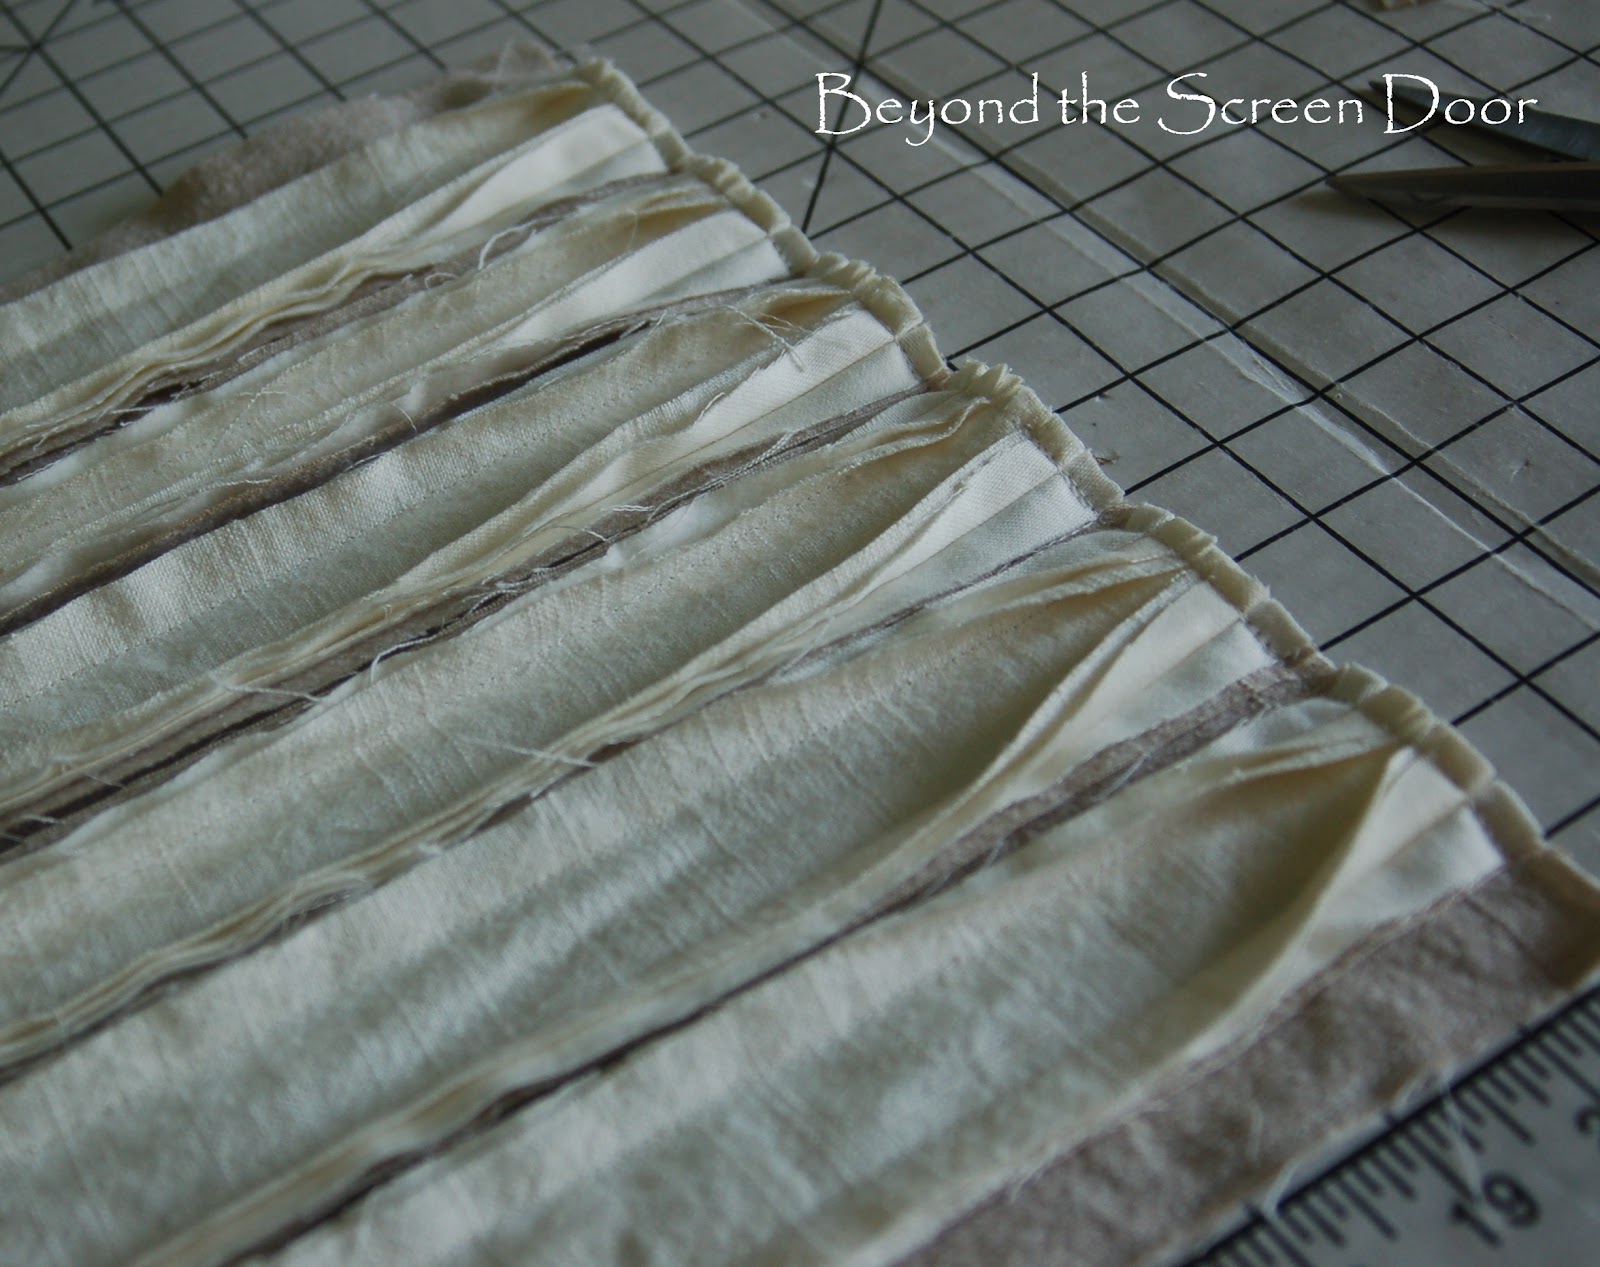
Sew your strips of fabric wrong sides together (batting side) using a 1/2" seam, alternating ivory and taupe making sure you end with one taupe strip at the top and one at the bottom.

This is how the back side of your pillow face will look.
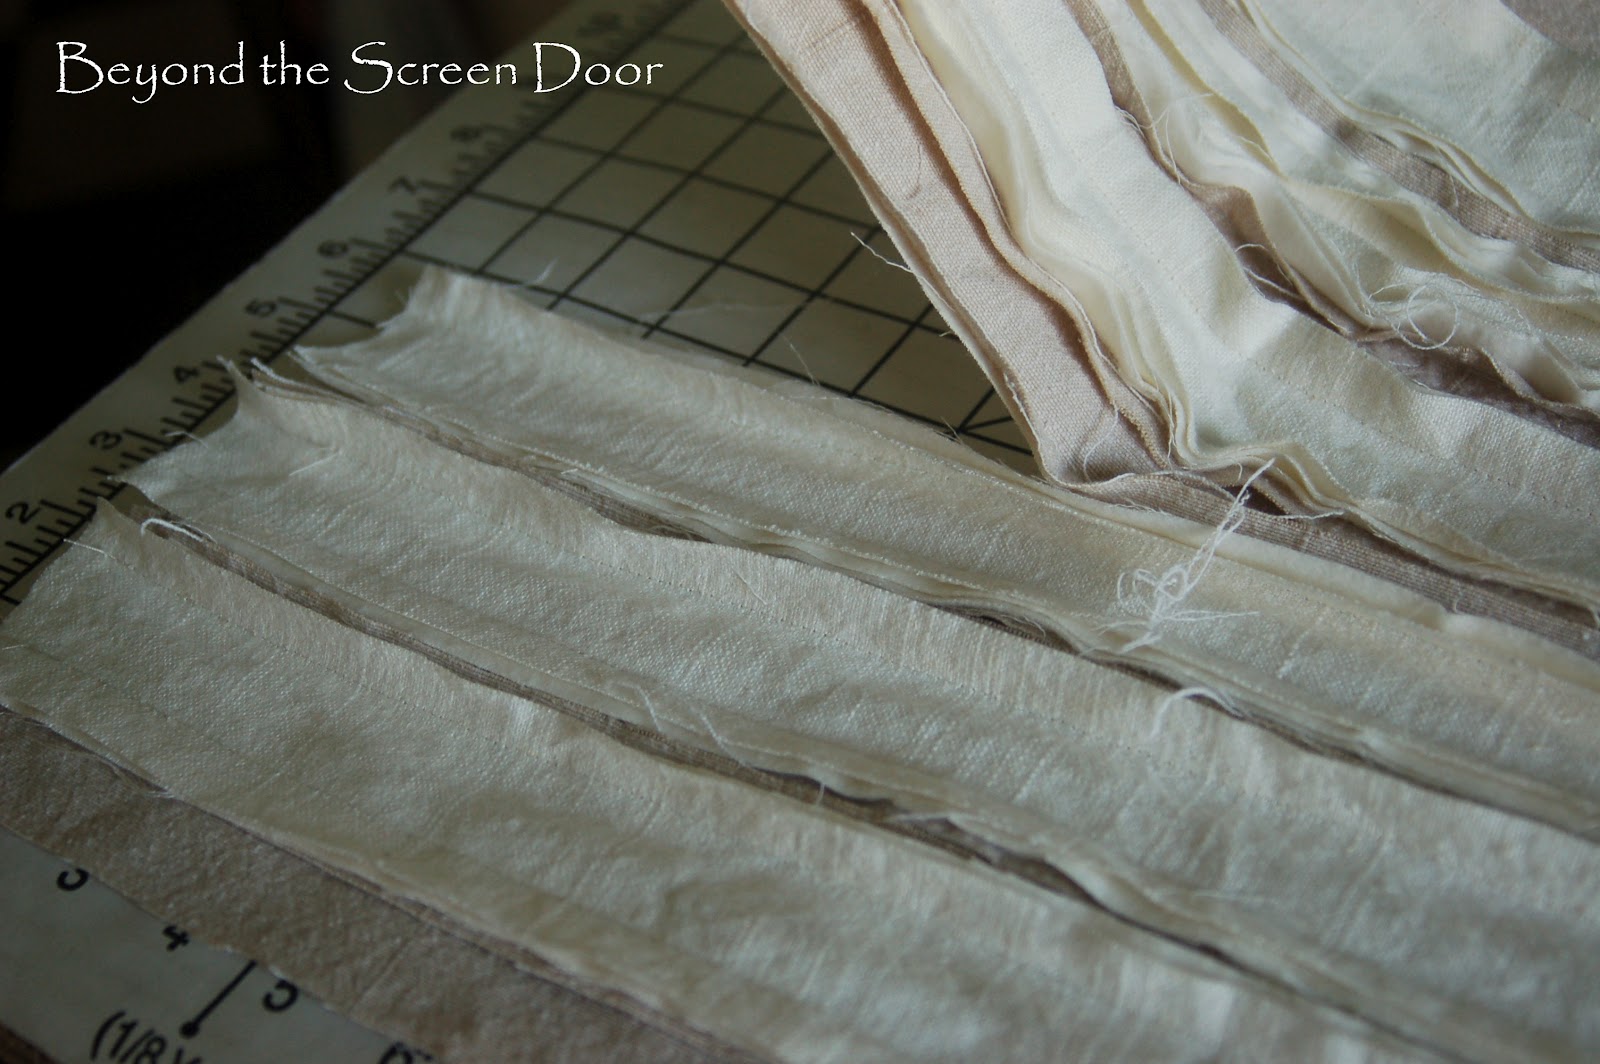
The next step is to cut away part of your stripes to allow for the stars.
Now, because this was a prototype, so to speak, and I was winging it, I didn't take the time to figure out 6 stripes at one size and 7 stripes at another size the way a seasoned quilter might have done.
*See comment below from the clever Miss SheliaG for a better way to accomplish this step.
*This is where I have to sheepishly admit that due to my winging it, this pillow did not end up the size I originally planned.
I planned to have a 16.25" x 24" piece at this point.
Logic tells you that 13 @ 2.25" strips sewn together with a 1/2" seam allowance = 16.25".
Logic, however, does not explain why I cut my strips at 1.75"! So at this point my piece is now approx 14x24.
(Which still doesn't make sense mathematically!)
This is why I suggest you wait until this point to cut the layers for your stars. I'll be sure to come back and edit this to give you my exact measurements once I've made a second pillow!
Continuing on...
Count up 6 stripes from the bottom and separate your seam allowance. Come in 10" or so and cut the remaining 7 strips.

The next step is to layer your 3 @ approximately 10"w x 9"h pieces of fabric.
I chose to use three layers here not knowing exactly how the stars would turn out. The layers are, top to bottom: taupe, batting, ivory.
Sew your layers in place wrong sides together.

Now, remembering I'm winging this, I grabbed the closest thing handy that happened to be a circle and used it as a guide to mark the stars.
You may use your own handy canister lid or a more scientific method of marking the placement for your 13 stars.

Next, cut tiny star-like patterns, through all 3 layers, at each of your markings.
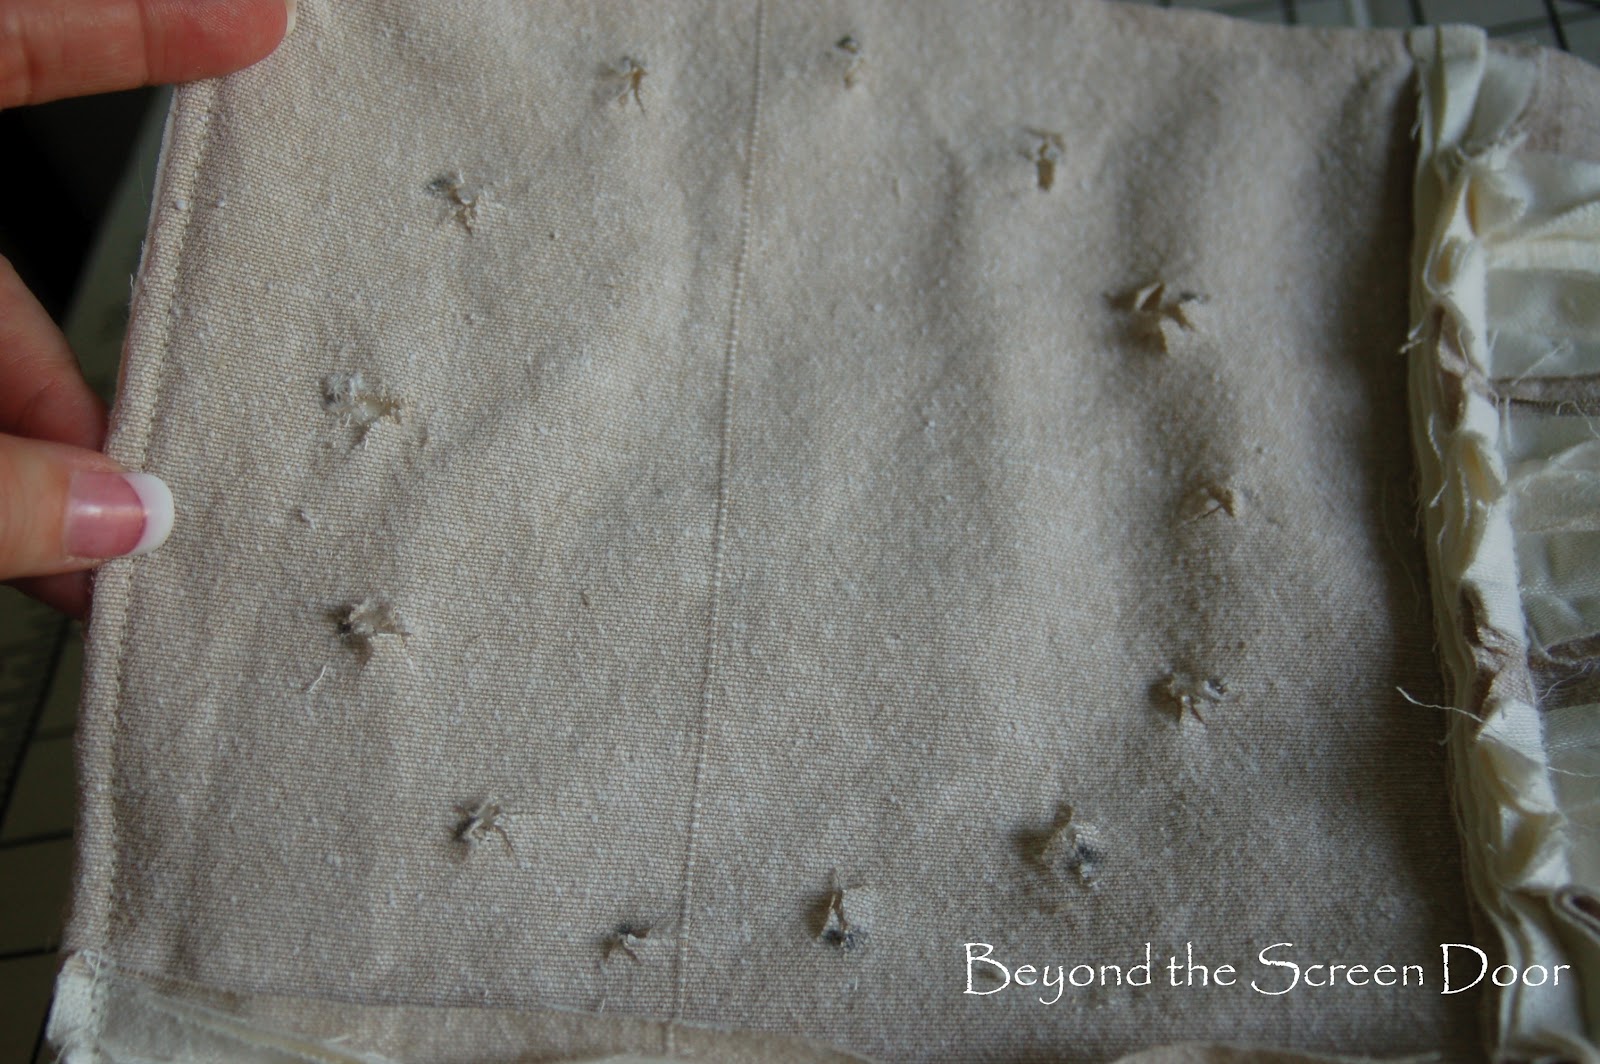

Not knowing exactly what would happen when I washed my pillow cover, (instructions coming up soon) I chose to machine stitch a figure 8 pattern around my cuts in the hopes of securing them a bit.
You could forgo this step if you choose.

On the back side of your pillow cover, pin your last piece of ivory fabric in place. From the front side of your pillow cover, topstitch this piece in place. This allows your star cuts to not be open to your pillow insert.
Trim pillow to desired width if necessary. Opening up each seam allowance, topstitch around the entire pillow top.

Next, carefully cut snips in your exposed seam allowance approximately every 1/2".
At this point cut a piece of fabric for the back of your pillow. Sew pillow top and back together, right sides together, leaving an opening along lower edge.
Wash pillow cover in warm water and tumble dry.
You may consider washing your fabrics prior to sewing, as well. It's not necessary but shrinkage will need to be considered.
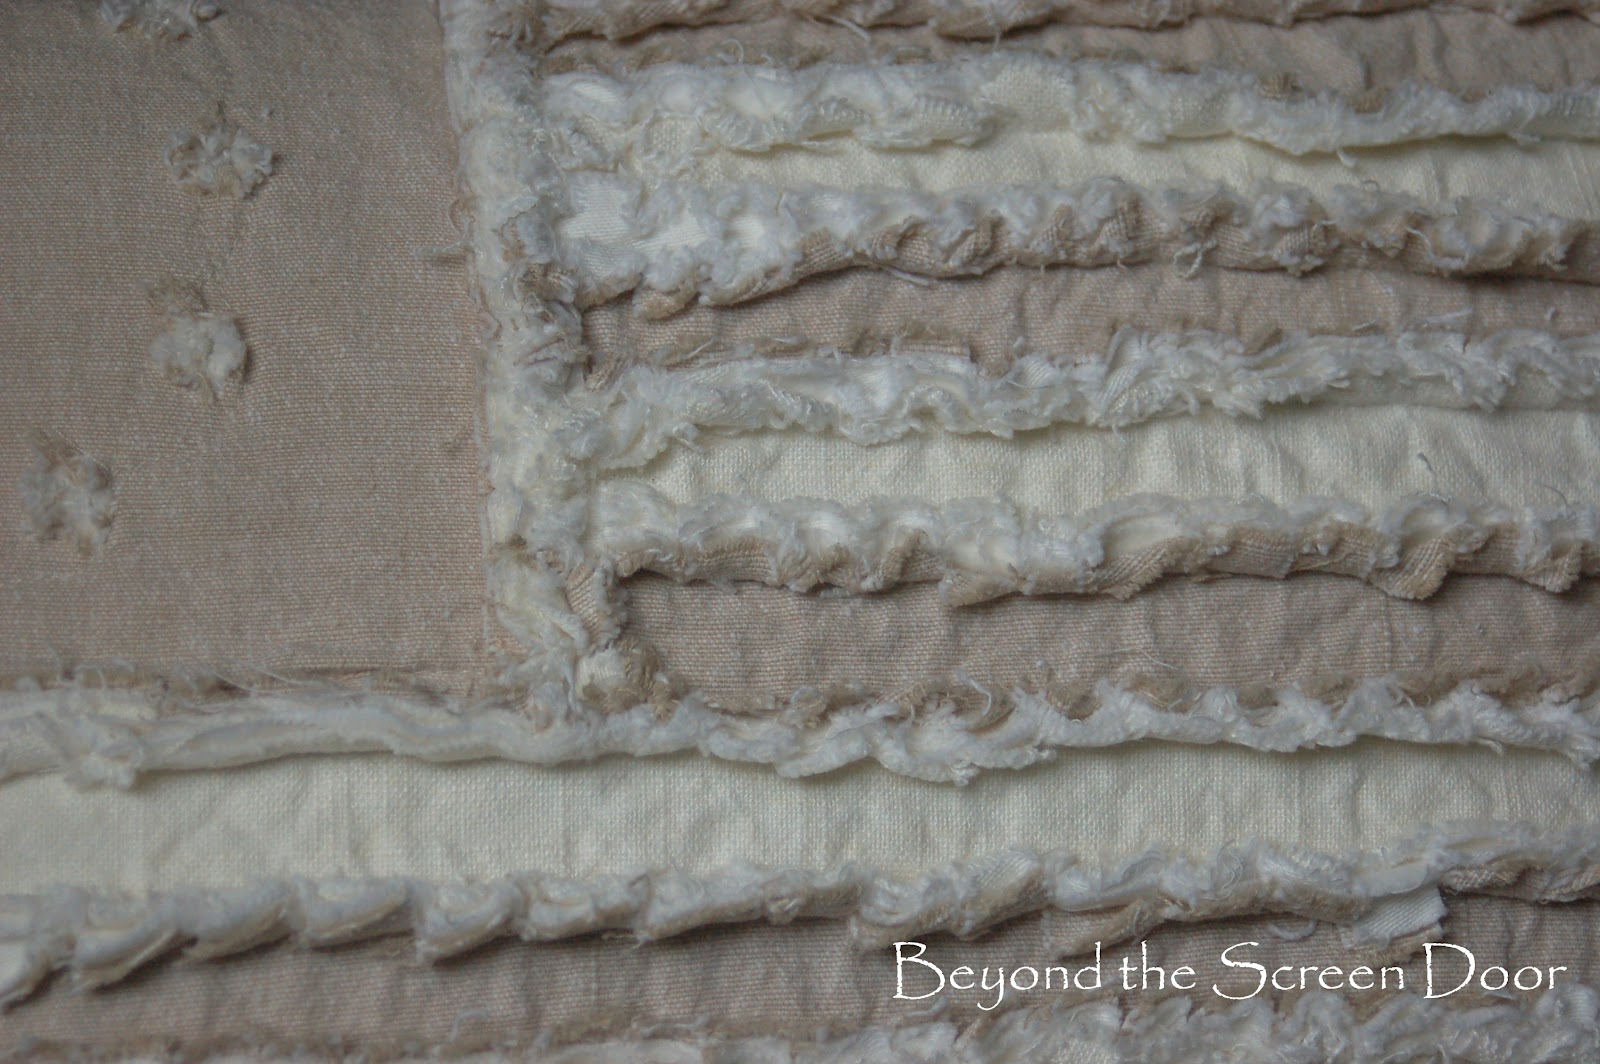
The wondrous result of washing the sniped and exposed seam allowance is what gives this process the Rag Quilt name.
I love this result!
Last sidenote...you'll have lots of strings in your lint catcher! I also took my pillow cover outside and gave it a good shake to remove the lingering threads.

Make your own pillow insert OR (if you're lucky and your pillow turns out the exact size you intended) use a ready made pillow insert.

Machine or hand stitch the opening closed.


I truly love the way this pillow turned out. Measuring issues and all.
In fact I have plans to use this technique again! And hopefully, I won't be winging it the next time!
I'd love to hear if any of you have tried the rag quilt technique.
Also, you seasoned quilters are welcome to pass along any much-needed quilting tips to us non-quilters!

Sharing with:
Love it, Sonya! I love the neutral colors, too.
ReplyDeleteI love your pillow! You used my two favorite colors for decorating. People that can sew are so talented to me. ~ Jamie
ReplyDeleteHi Sonya, had to stop by and say thank you for your visit and your very sweet comments on my Master Closet.. I love to build and my hubby told me he was going to hire me out..lol
ReplyDeleteYour pillow is really nice and I'm off to take a stroll through your "Shop"...
Have a great week!
Sandy
That is simply fabulous!
ReplyDeleteGreat tutorial too, I would love to try it sometime!
Cindy
That is so cute, I love the colors!!
ReplyDeleteI love it! Great job! Dang I wish I could sew! LOL
ReplyDeleteSonja, it's beautiful! So original too. You have a LOT of patience my friend. :-)
ReplyDeletexo
Pat
Sonja, it's beautiful! So original too. You have a LOT of patience my friend. :-)
ReplyDeletexo
Pat
What a great looking pillow! Great job!
ReplyDeleteI have never seen this done, Sonya! It is BEAUTIFUL! I love the old-fashioned look to it. What a great job you did "winging it". xo Diana
ReplyDeleteOm my gosh this little pillow is the bees knees!
ReplyDeleteSo cute!
♥Linsey
What a great pillow! Stay strong! LOL
ReplyDeleteYour pillow looks great- I've never seen this technique before, but I love the soft homey look. My measurements never seem to work out right, either! One thing that should make your project a little easier is to cut your short strips first and attach to the square. Then measure the length and cut your longer strips to that measurement and attach. Then you don't have that inside corner to deal with.
ReplyDeleteThank you, Sheila, for sharing this with us! It makes much more sense to do it this way than the way I went about it. Thank you!
ReplyDeletelovely lovely lovely - thanks for the shout out re: my ruffled rag quilt as your inspiration - I'm tickled pink to see how fabulous your project turned out!! The soothing colors on it are unexpected and just wonderful! xo
ReplyDeletehttp://www.NorthernCottage.net
Absolutely ADORABLE!!! I love it.
ReplyDeleteSonya, OMGosh! I love it!! It's just perfect. I may have to make this one. Thank you for sharing this at Make it Pretty Monday @TheDedicatedHouse. It means the world. Wishing you a grand evening. Toodles, Kathryn
ReplyDeleteThat is so pretty.........visiting you via WOW party.......Deana @ CountryMommaCooks
ReplyDeleteThat is adorable. I love it, but could never sew that. At least not for a few years. How long did it take you?
ReplyDeleteI am co-hosting a Patriotic Link up Party. I would love to have you join us.
http://www.suzyhomemaker.net/2012/05/lets-party-like-its-1776.html
The look of the outside seem allowance is very fun. Looks so soft. I'm like you, I tend to figure things as I go. Love that you did this and had the fortitude to describe the process, and then for those who haven't the patience, you offer the purchase. Good thinking!
ReplyDeleteLiz
I love this! Ready to get the old sewing machine out this afternoon and get started. Thank you so much for the tutorial! Shirley @SKLongImages
ReplyDeleteThat is one gorgeous pillow!
ReplyDeleteDee
I don't blame you at all for wanting to keep that pillow for yourself! It is gorgeous! Visiting from Stonegable TTT. Debbie
ReplyDeletethat took a lot of work! If I could make something like that I would definitely want to keep it for myself too.
ReplyDeleteHi there, my name is Vanessa Harris and I found you through the Stone Gable's TTT tonight! I love the pillow, you are so creative. I am new to the blog world...just started one myself last week. I would love for you to visit my new EBoutique & Blog if you get a moment. www.vintageinfused.com
ReplyDeleteThanks for the inside information on the great pillow!
Hugs,
Vanessa
Sonya, what a great pillow! Thanks for the detailed tutorials. I never knew making a rag pillow was so much work!
ReplyDeleteBut this pillow would be worth it! It is fabulous!!!!I would love this for my Patriotic guest bedroom!
Thanks for joining TUTORIALS TIPS AND TIDBITS!
I love this pillow - thanks for such great instructions to make it :)
ReplyDeleteBlessings!
Gail
Hi darling, what a great looking pillow. Thanks for a great tutorial on making it.. hugs ~lynne~
ReplyDeleteI love it!!!! After all that work, I think you should keep it for yourself :) It is lovely! I am your newest follower. I hope you can visit me sometime too :) I would also love for you to share this at my Linky party that is going on right now called Rustic Restorations Weekend.
ReplyDeletehttp://homespunhappenings-tammy.blogspot.com/2012/06/rustic-restorations-weekend-party-8.html
I never would have thought of a natural colored flag but of course you would. You amaze me and I love this look. Thanks for sharing it with the readers on BeColorful.
ReplyDeletep
I've been trying to figure out how to make an American flag pillow -- tone on tone like my Union Jack -- and now you've given me some serious great ideas here!
ReplyDelete:)
Linda
I'm so glad you shared at Pillowpalooza! It's such a great pillow and a great tutorial!
ReplyDelete:)
Linda
So darling!! I love it- so creative! Sharing at the party tonight- thanks for linking up at Feathered Nest Friday!
ReplyDeleteYay! I am so glad you came by and linked this up to Rustic Restorations Weekend!
ReplyDeleteYour flag pillow is adorable, Sonya! You have made Betsy Ross proud!
ReplyDeleteI've just this week returned from an extended blog break and yes, Potpourri Friday is in progress!
It's nice to "see" You again!