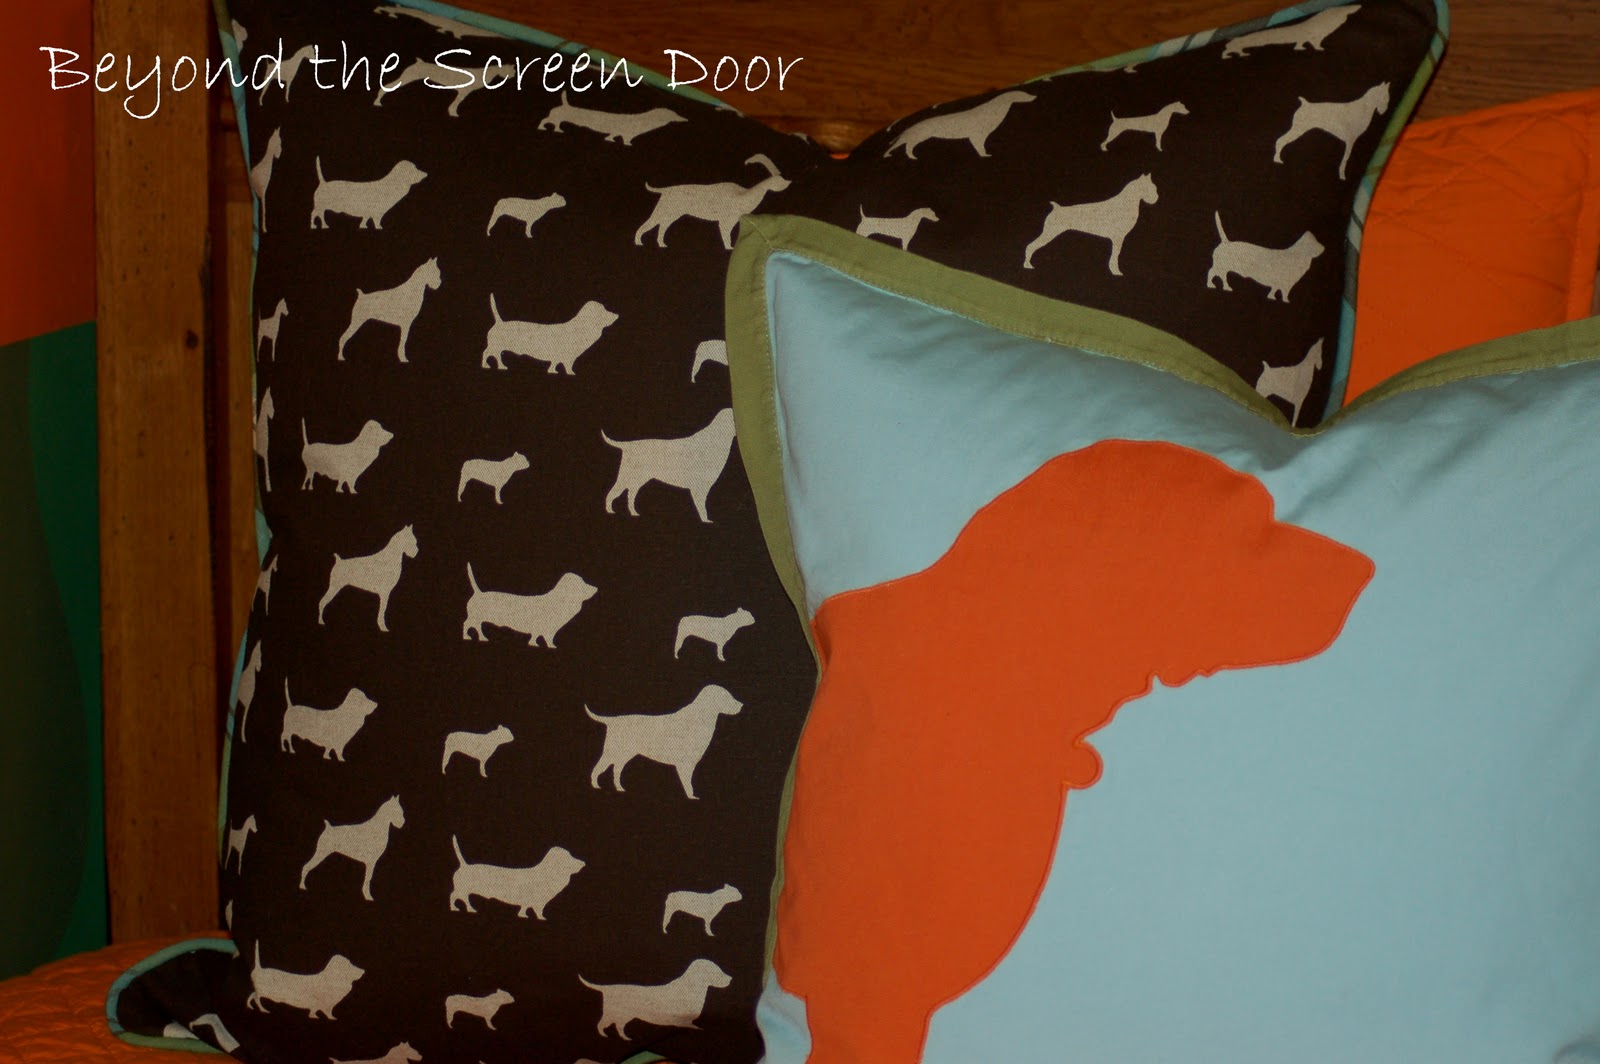
(The Labrador silhouette pillow was purchased at Serena and Lily.)
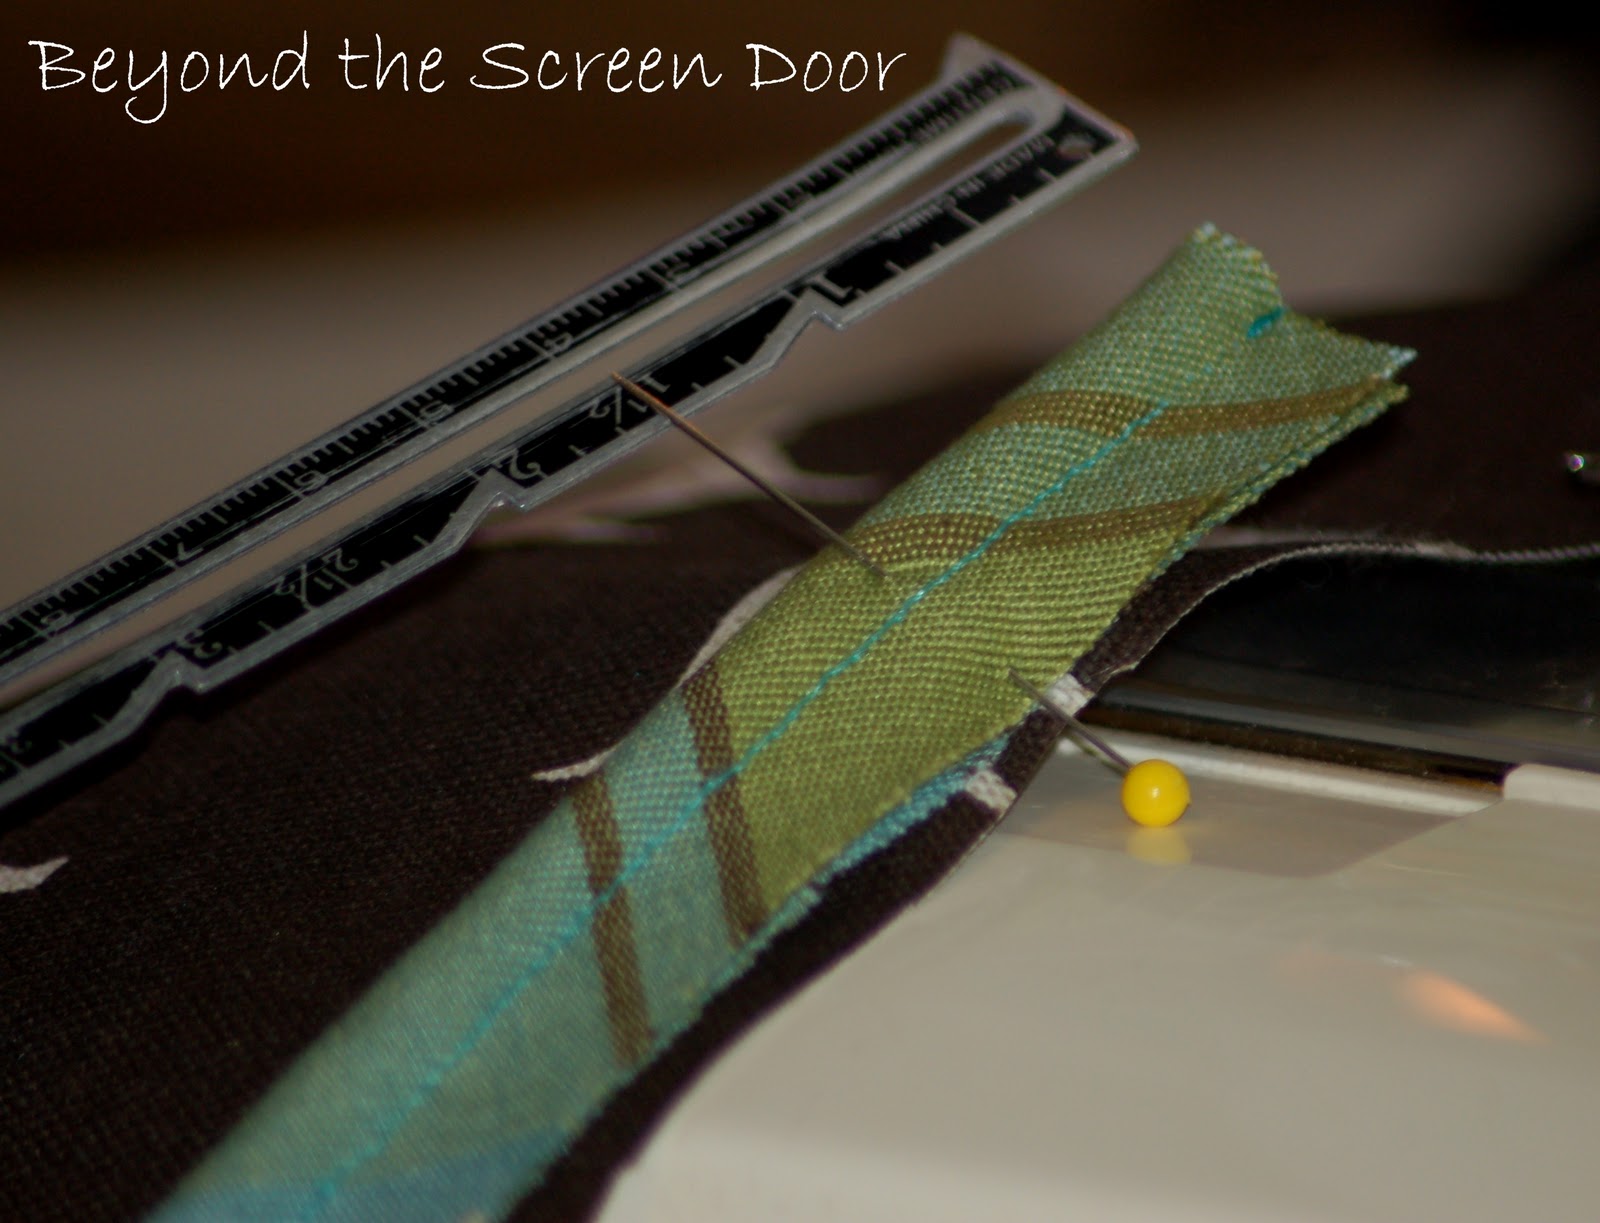
The cotton cording I am using here is on the small side. I think the size is 6/32. I think. To cover the cording with enough fabric left over for a 1/2" seam, I cut my fabric 2" wide. Occasionally the finished seam allowance has to be trimmed slightly in order to create the 1/2" seam allowance. I'd rather trim off the excess than cut it too small and not have enough!
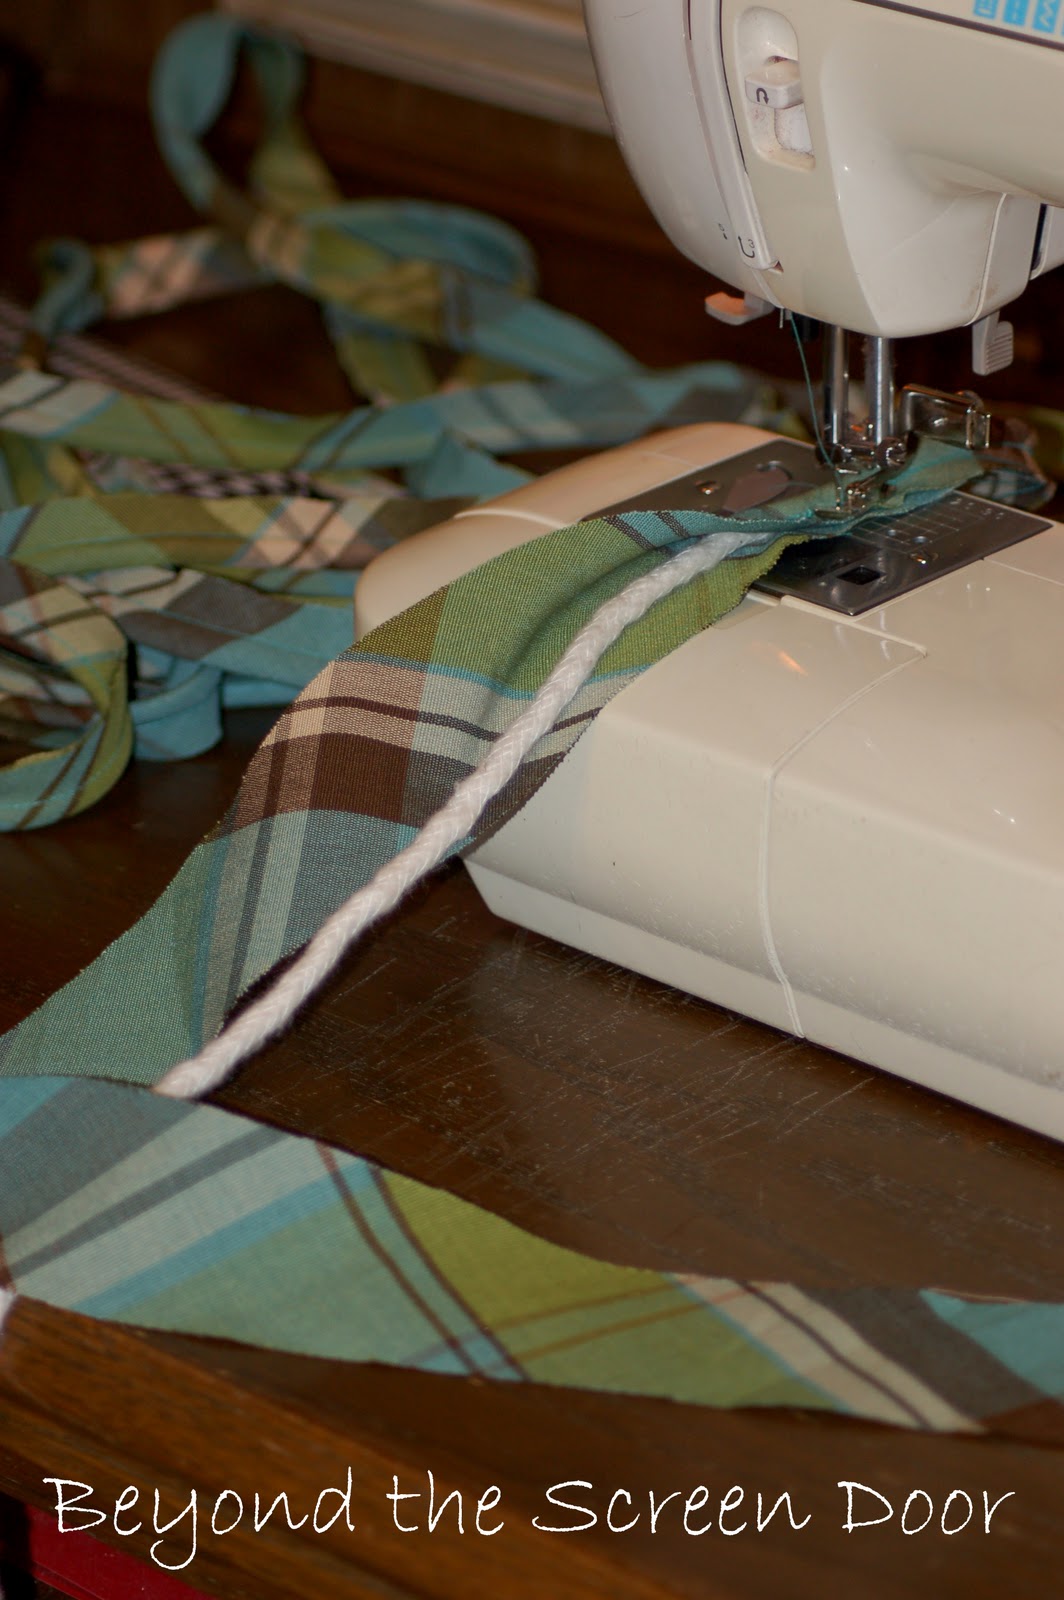
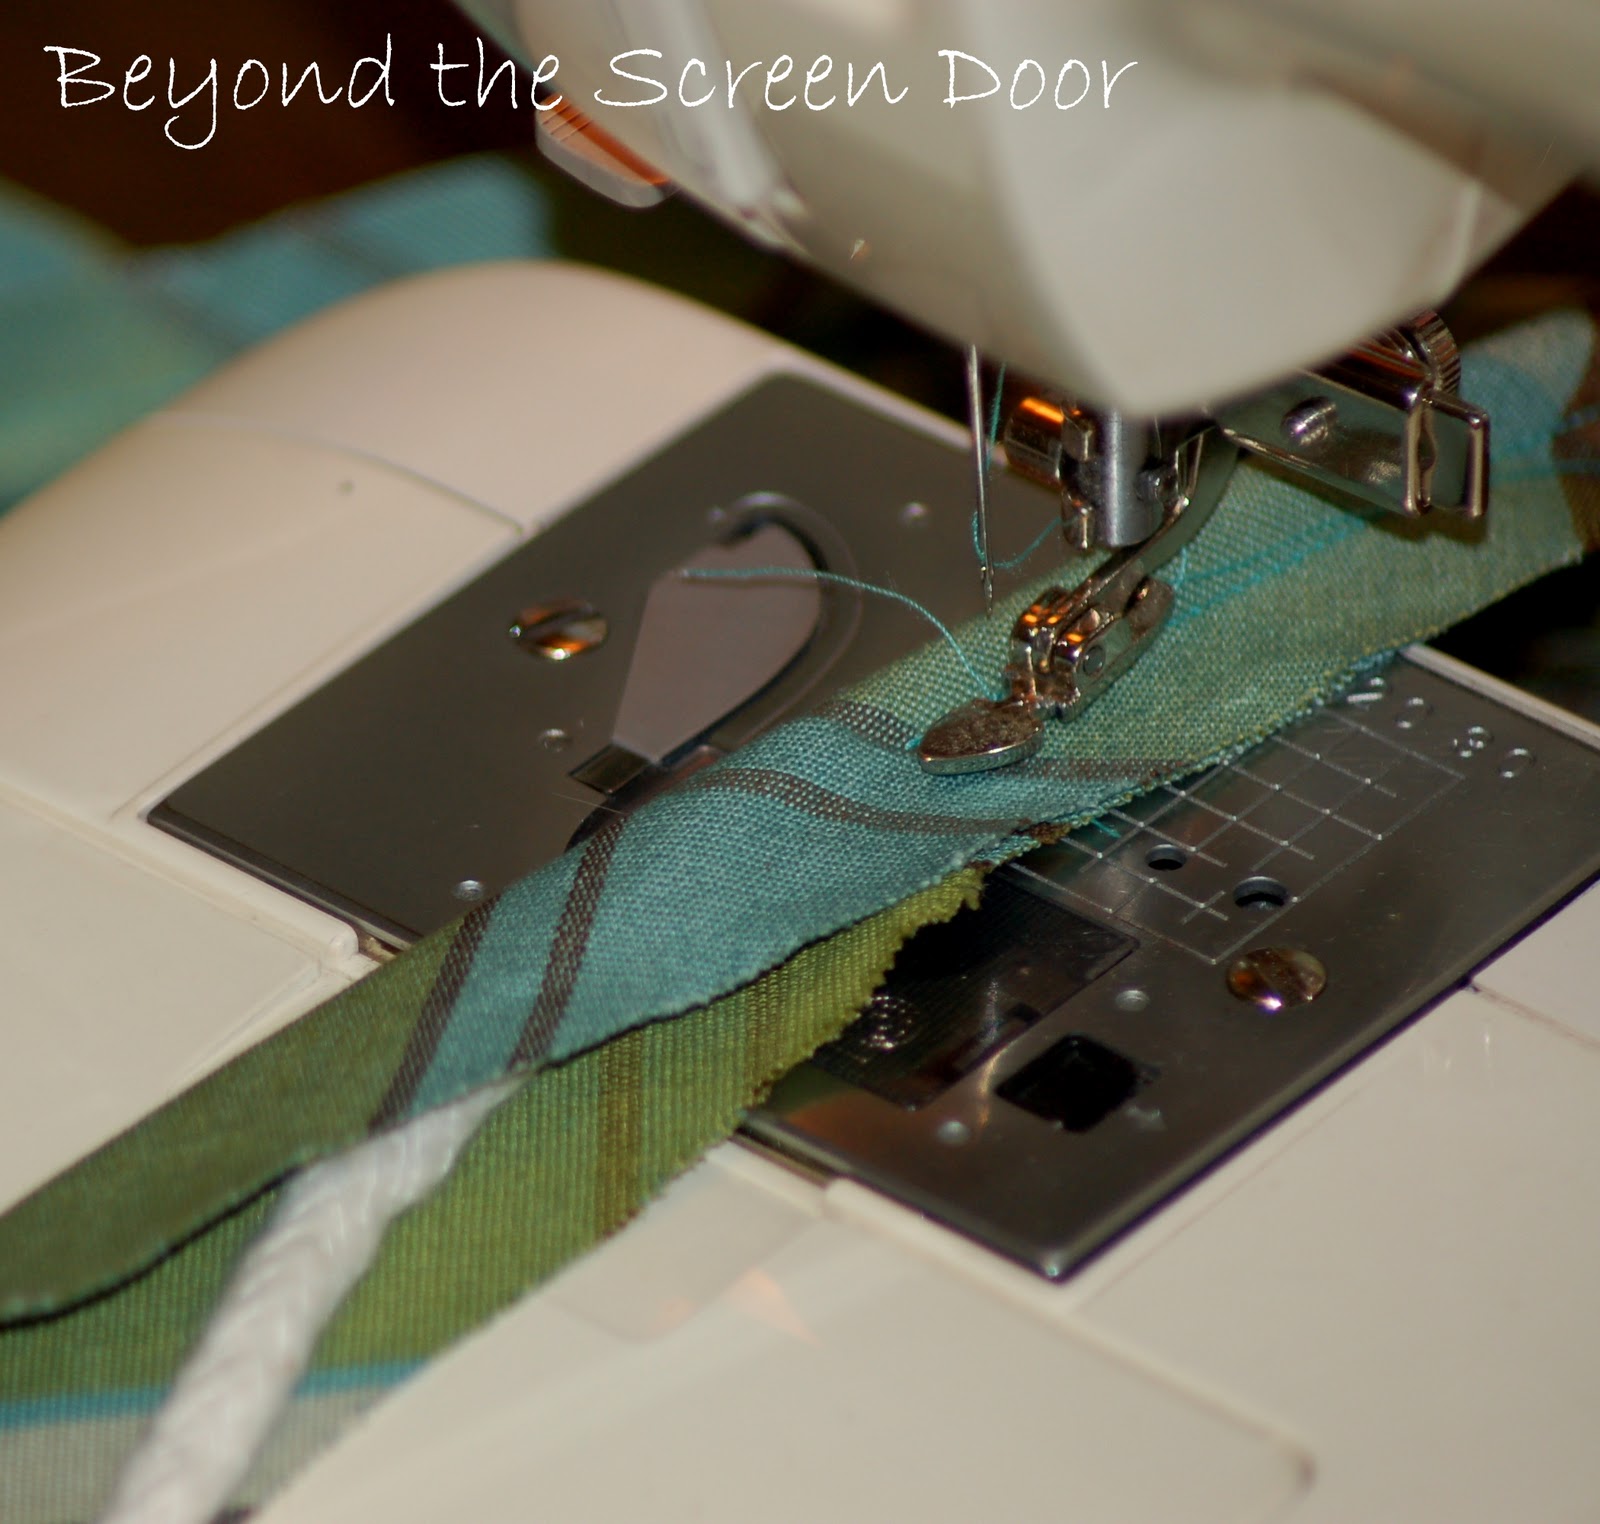
When cutting fabric to cover cording, it is always best to cut on the bias. That is, to cut it diagonally across the fabric. This gives the fabric a little "stretch". Fabric cut straight tends to "bunch" as you sew, if being used for self-piping. Another great thing about cutting on the bias is when you are using a stripe, check or plaid you get a completely different look with your piping. It's pretty cool!
Once your 2" wide, bias pieces are cut, sew together lengthwise to form one long strip of fabric. For instance, if you are making one 24"x24" pillow, 4sidesx24"=96". You will need a strip of fabric approximately 100" long.
*Polly @ Make Mine Beautiful has a great tutorial on cording. Take a look HERE for an additional way to cut and sew your fabric for the cording.*
Fold your strip of fabric around the cotton cording. Using your zipper foot sew close to the cording.
When using piping, how you "close" or finish the ends depends on the project. This is the process I use when making a pillow where the ends of the piping will come back around to meet each other.
Place piping, edge to edge, with your pillow fabric. Using your zipper foot, begin sewing piping to pillow fabric 1.5" from the end of your piping. Meaning, leave 1.5" loose, not sewn down. Sew piping to the front of your pillow fabric.
When you come to the corner of the pillow, cut one or more small slits in the seam allowance of the piping, being careful not to cut your seam. This allows the piping to "round" the corner of the pillow smoothly.

When you have sewn the piping completely around the pillow fabric, stop sewing approximately 1.5" from the start of your piping.

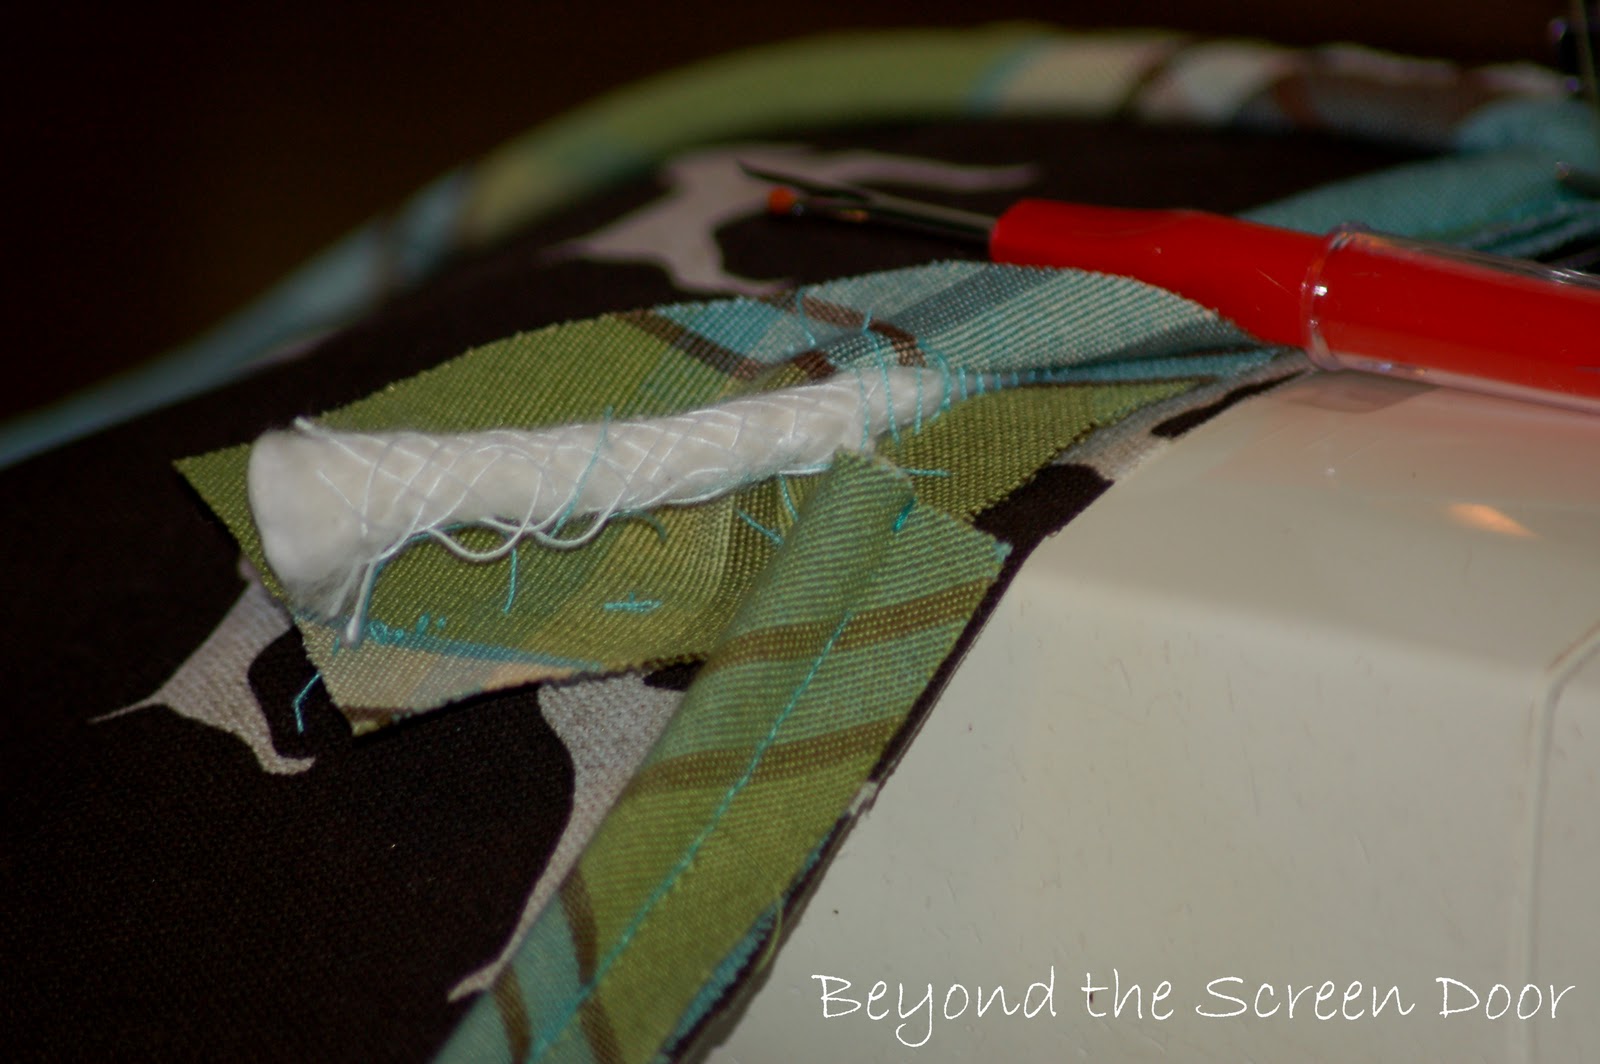
Fold your fabric over approximately 1/2" where it will overlap the joint of the two pieces of cording.

Pin in place. Again, using your zipper foot complete the process of sewing the piping to your pillow fabric. At this point, pin top and bottom pillows fabrics together, still using your zipper foot, sew together. Occasionally, this process of sewing top and bottom fabrics together will have to be done more than once in order to get a tight, close seam up against the piping. The tighter the seam, the nicer the finished look.

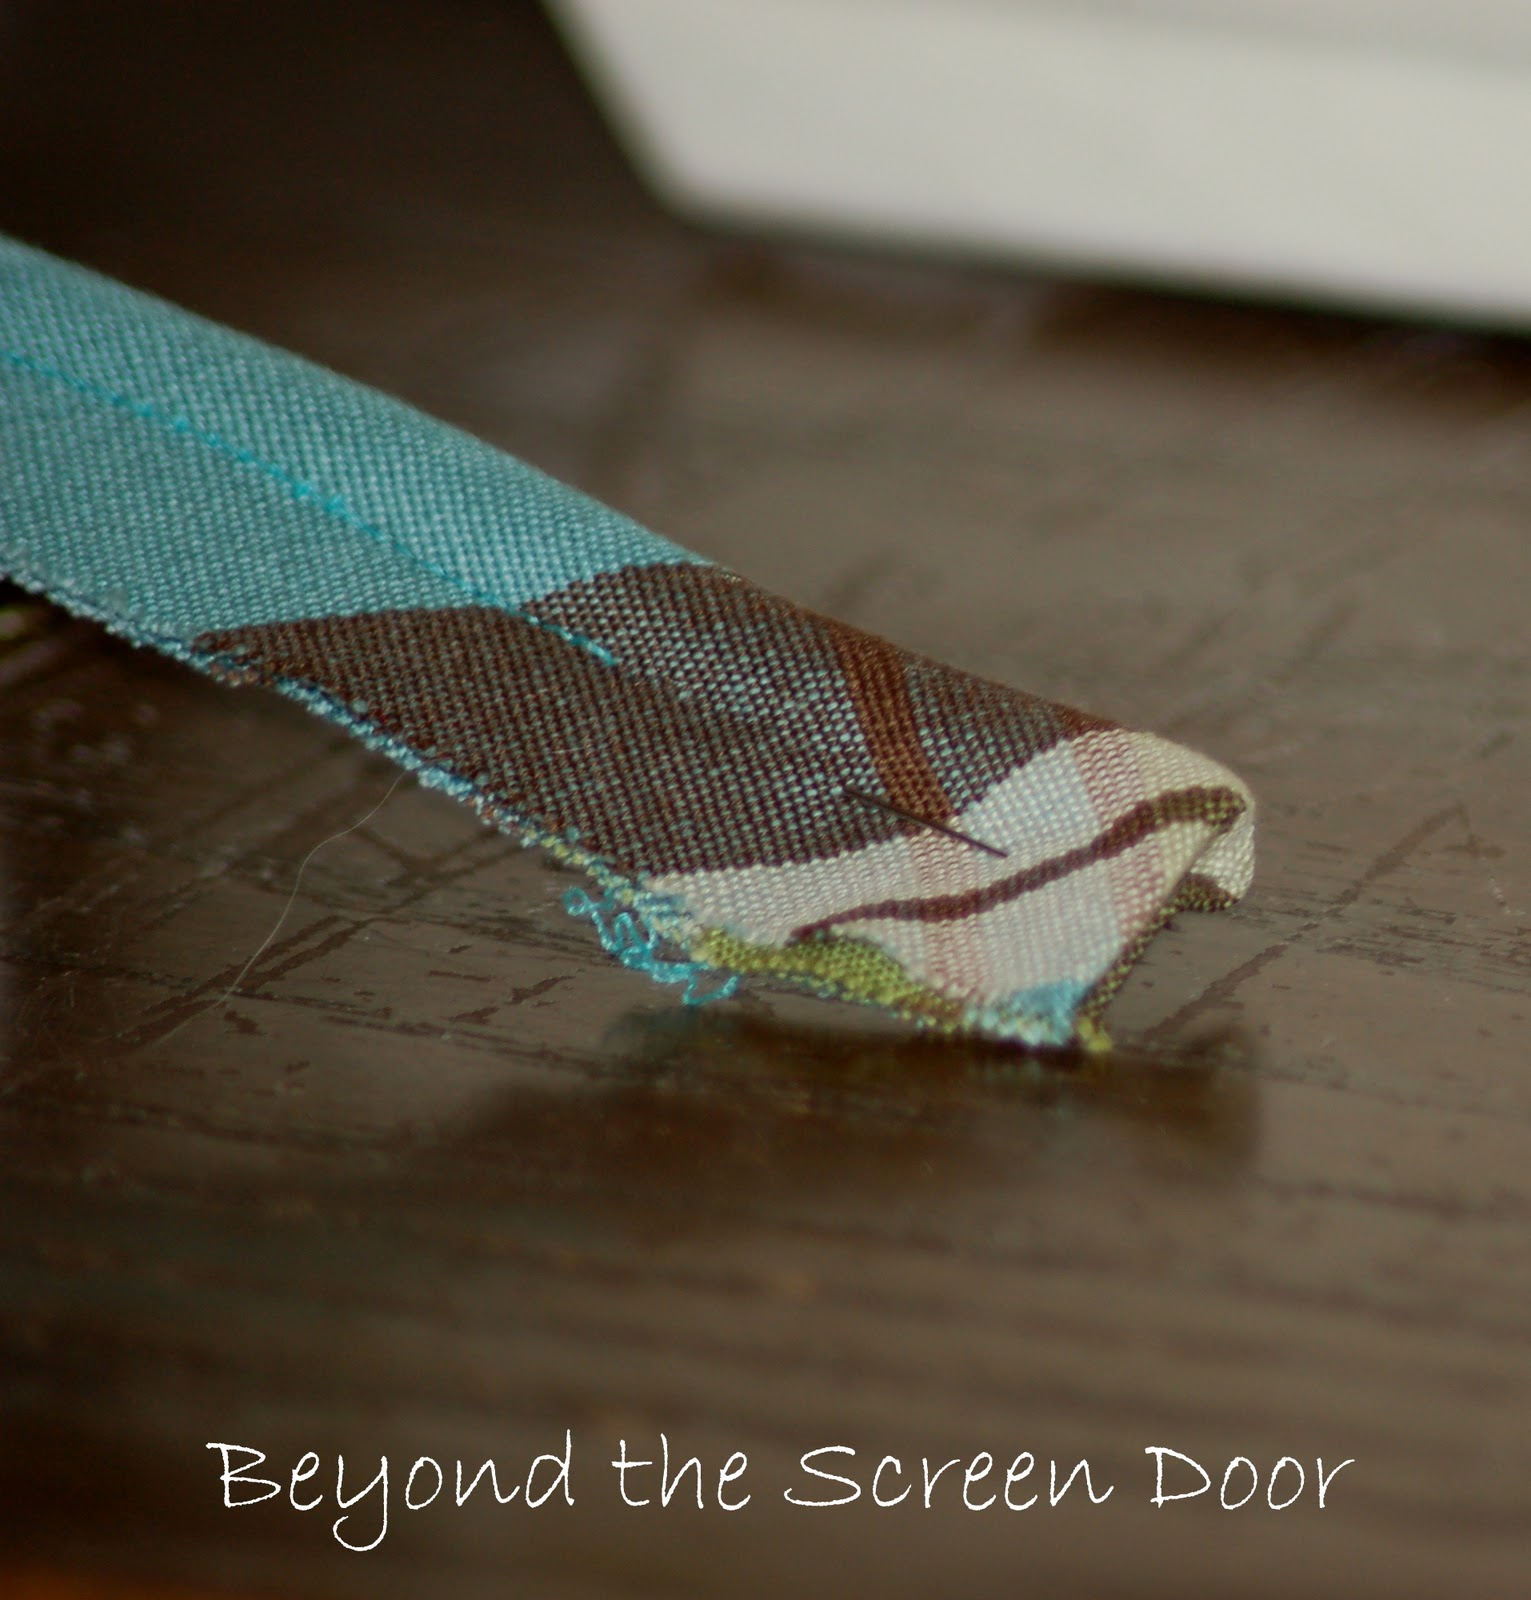
The following method is used if making a different project, like a curtain panel, where the piping needs to have a finished end. For instance, the curtain panel in THIS room was completed this way.
Leave fabric 3/4" longer than cotton cording on each end.

I hope this helps explain the process of making your own self-piping. Again, take a look at Polly's blog Make Mine Beautiful for additional sewing tutorials and design ideas! She has a gift for explaining the details!

LINKING TO:


I need to see if I have a cording foot. Unless it came with my machine I doubt it but have always wanted to make some cording for pillows.
ReplyDeleteThank you for this tutorial- I have been trying to figure this out for way too long- I just could not get cording onto my pillows. Thank you thank you!
ReplyDeleteHI there Sonya. I'm actually taking a break from sewing (1:45 am!) to check my blog reader. I think this is a great tutorial (and I love that plaid fabric!).
ReplyDeleteOne question I have for you is, when you sew the cord on the front side of the pillow fabric (before sewing the pillow together), do you sew tight against the cord the FIRST time around when you are securing it?
If so, let me add a little tip for your readers. If you sew the cord onto the face fabric a bit away from the cord, then when you put the two pieces together to sew them closed, you won't have the issue of trying to cover up your first row of stitching. Do that make sense?
This also works when you make the actual cording too. If you don't sew up too close to it, then it's much easier to get a tight fit in your final steps because you won't have to be hiding a stitch line. This would be a good tip for beginners. (I show this in the link you provided to my blog.)
Thank you for linking back to my tutorial. I appreciate your compliments.
Love everything I've seen you do - especially those shaggy pillows!
Great info...thanks!!!
ReplyDeleteCindy
Great tutorial, Sonya! I think I tried cording once and had no idea you had to use the zipper foot. I managed, but then again, the pillow I was making was for me so it didn't have to be perfect. I love the finished look it gives to pillows and accent chairs.
ReplyDeleteAlthough I already know how to do this, I never made a tutorial for it.
ReplyDeleteI am adding this post to my blog's Resources page, okay?
Because I have been asked how to do it, but not gotten around to showing it yet.
Excellent pictures and lovely fabric!
HUG and blessings on your day!
~me
What a great idea!! LOVE it!
ReplyDeleteI would love for you to come join me at my Linky Party!
Jan 21-23 (Fri-Sun)
Amy
www.thecraftysideoflife.blogspot.com
Thanks so much for the helpful tutorial!
ReplyDeleteI wish I could sew. The sewing projects are my most dreaded part of any design. I don't know enough about them and have to cross my heart and pray that the seamstress can figure it out on her own. I hate not having full controll. Your pillows with the dogs are so cute. I love the fabrics ect.
ReplyDelete