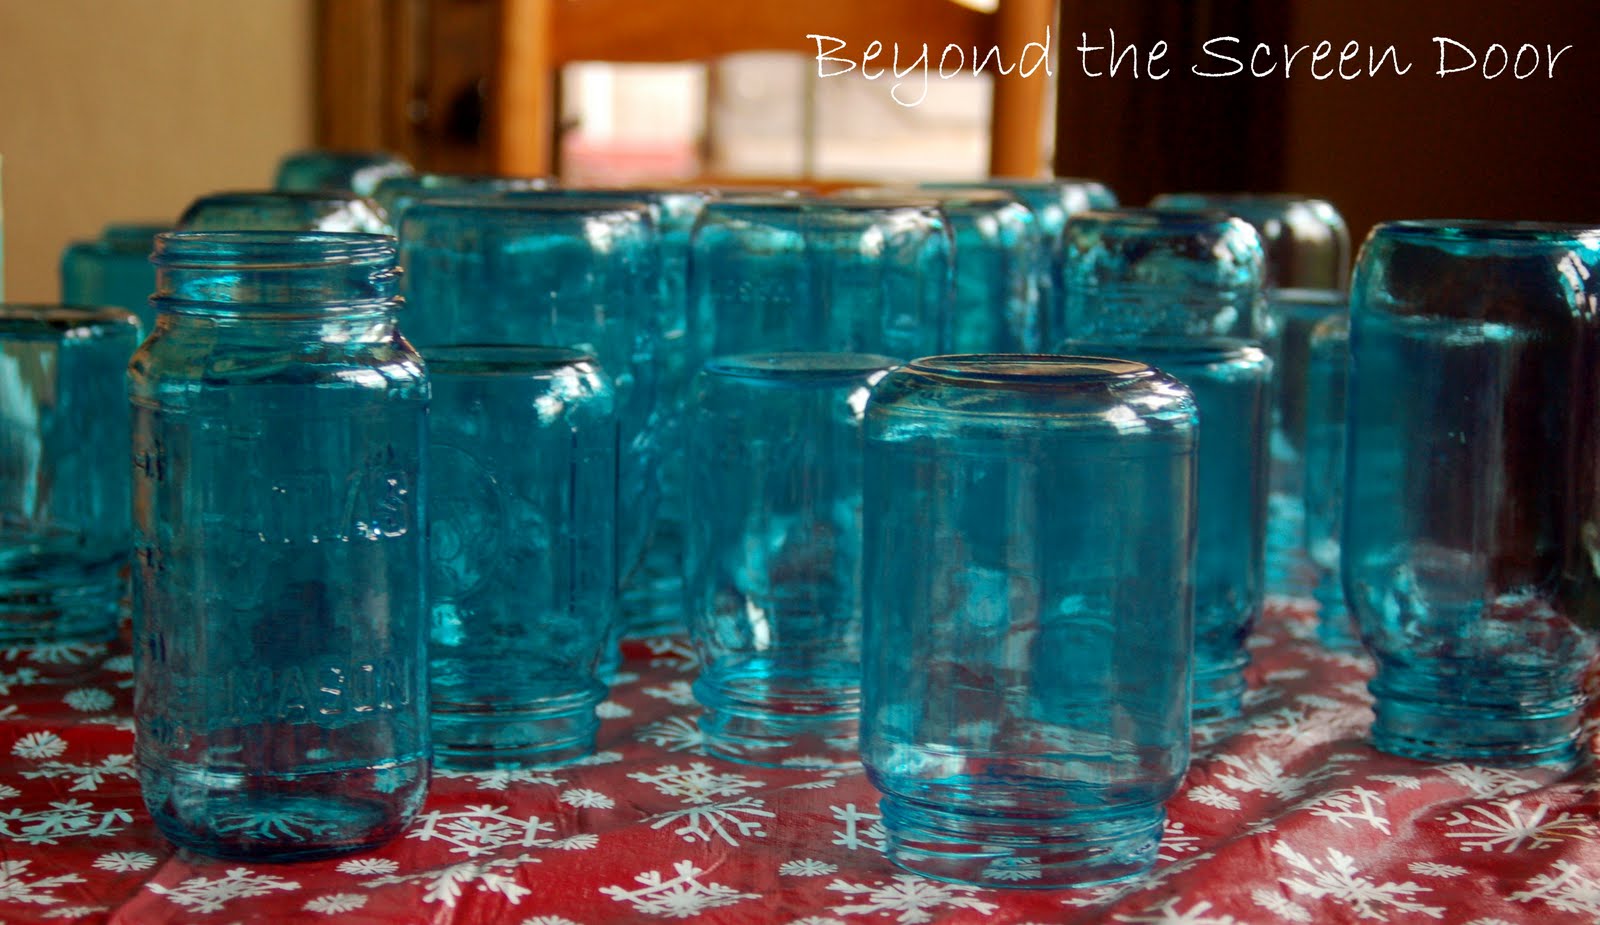
Weddings are a lot of work! (understatement of the year!) Especially when so many of the ideas involved are DIY projects! One of those projects consisted of painting 37 canning jars!
(Special thanks to my lovely assistant and hand model)
When we realized buying vintage blue canning jars was going to be a tad bit cost prohibitive, Courtney began searching for alternatives. She found that we could paint our own! The idea was found Here and instructions at Bridal Buzz.
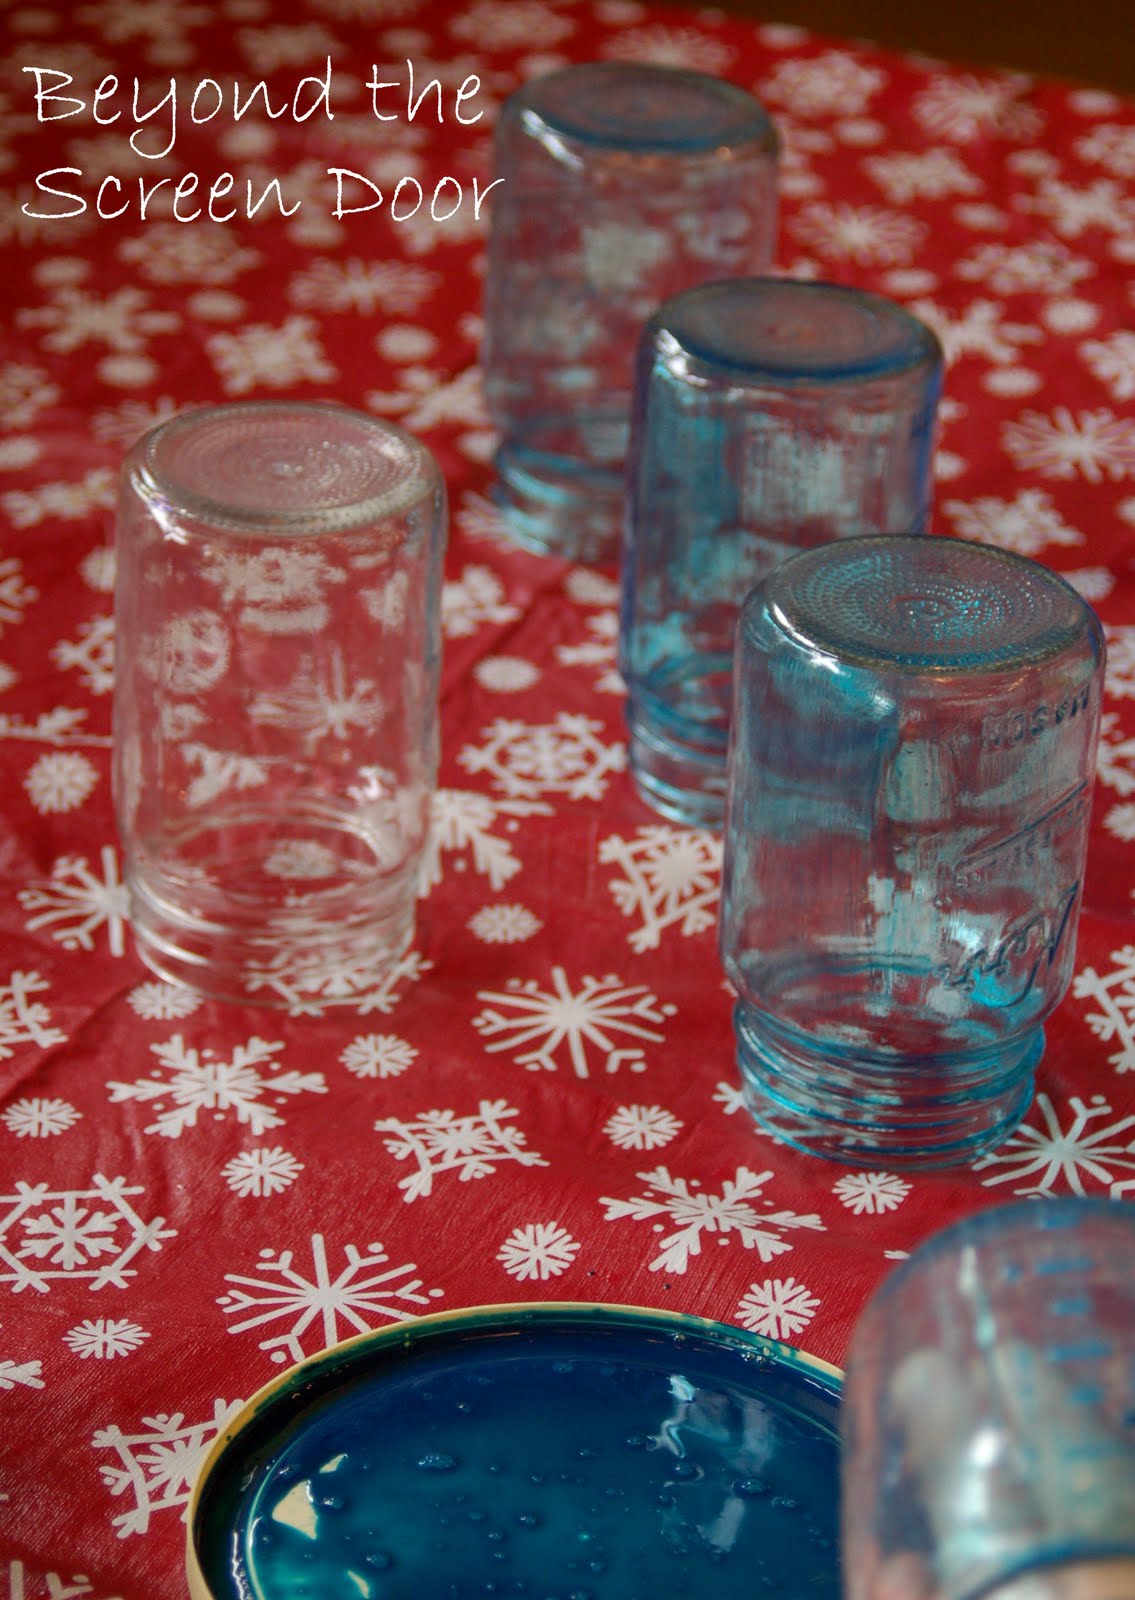
Here you can see the difference between the clear glass and the painted glass. We were a little tentative with the color at first. They became darker as we went along.
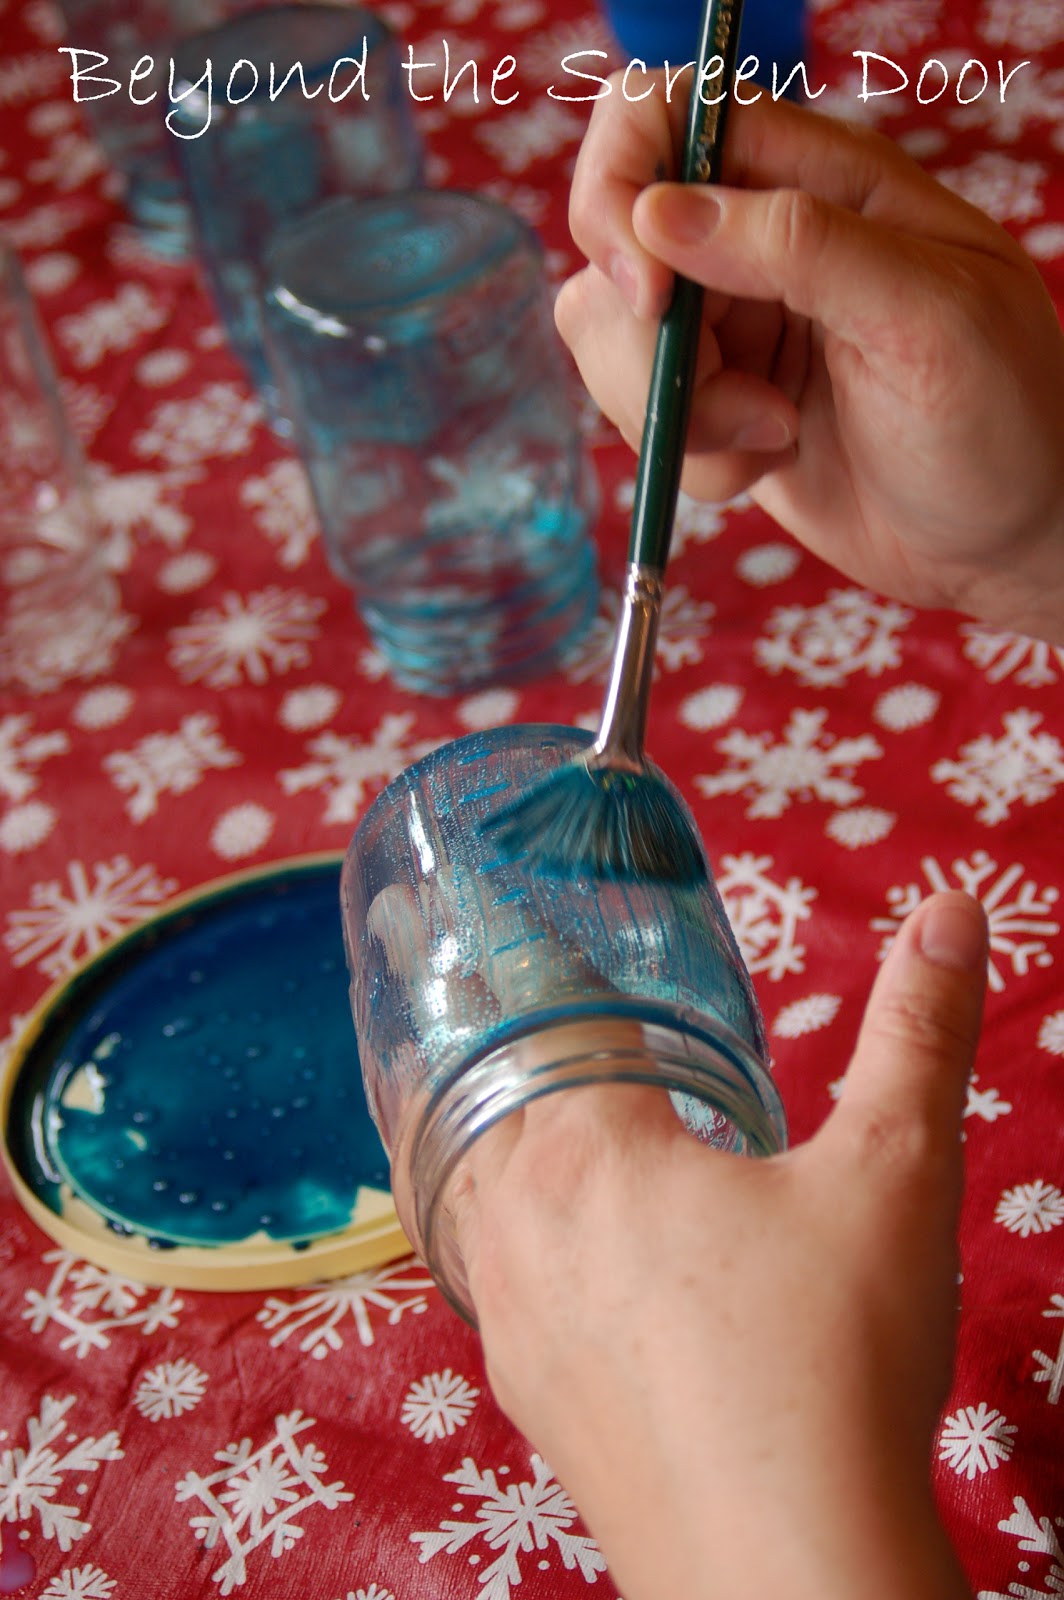
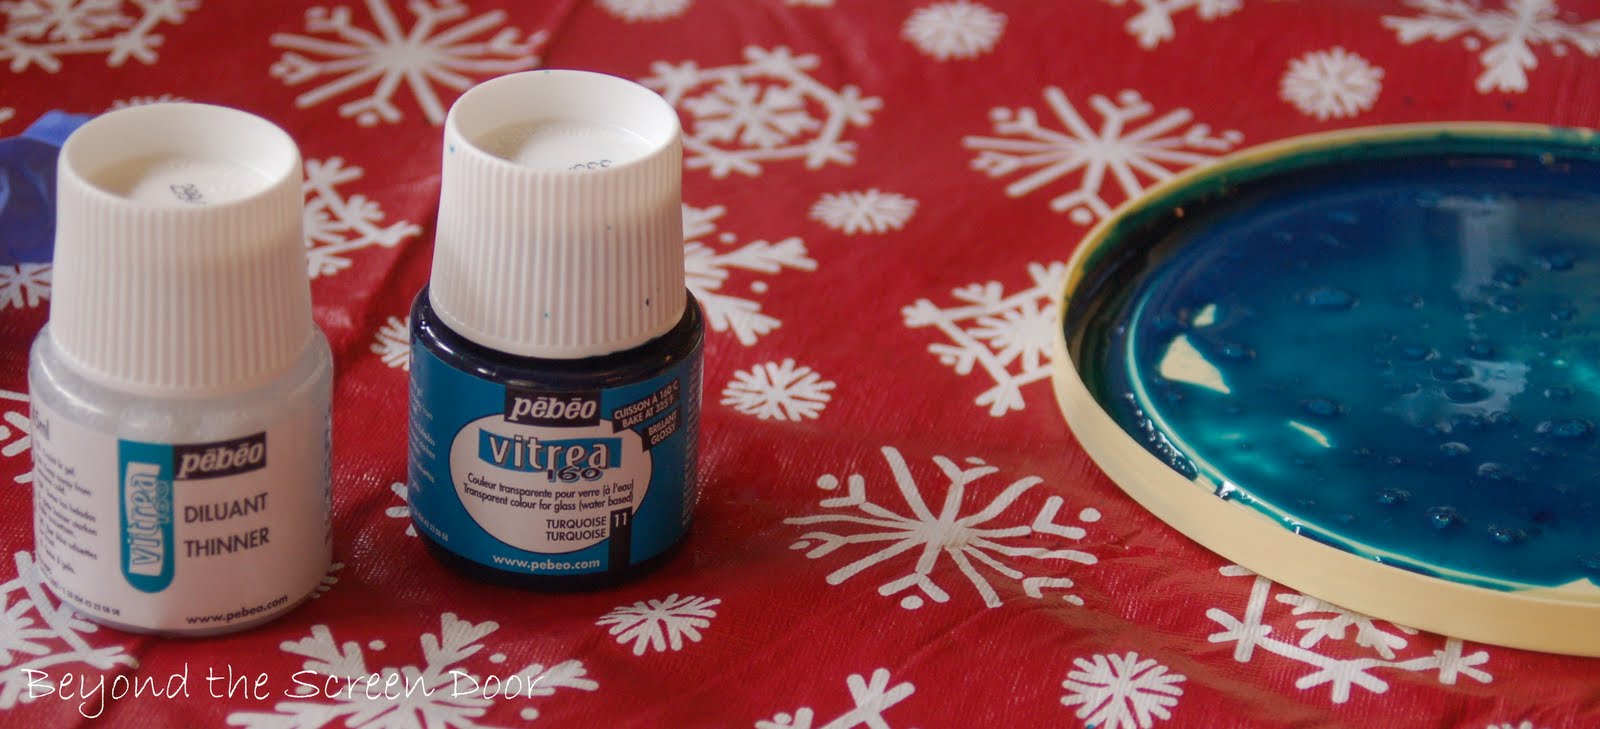
The trick to this project is the paint. The instructions called to use Pebeo Vitrea 160 turquoise glass paint and thinner, which I could NOT find locally. I ordered it from Blick Art Supplies at dickblick.com.
The instructions from Bridal Buzz were great. I also read through the comments from readers, who had tried this project, for additional tips and information.
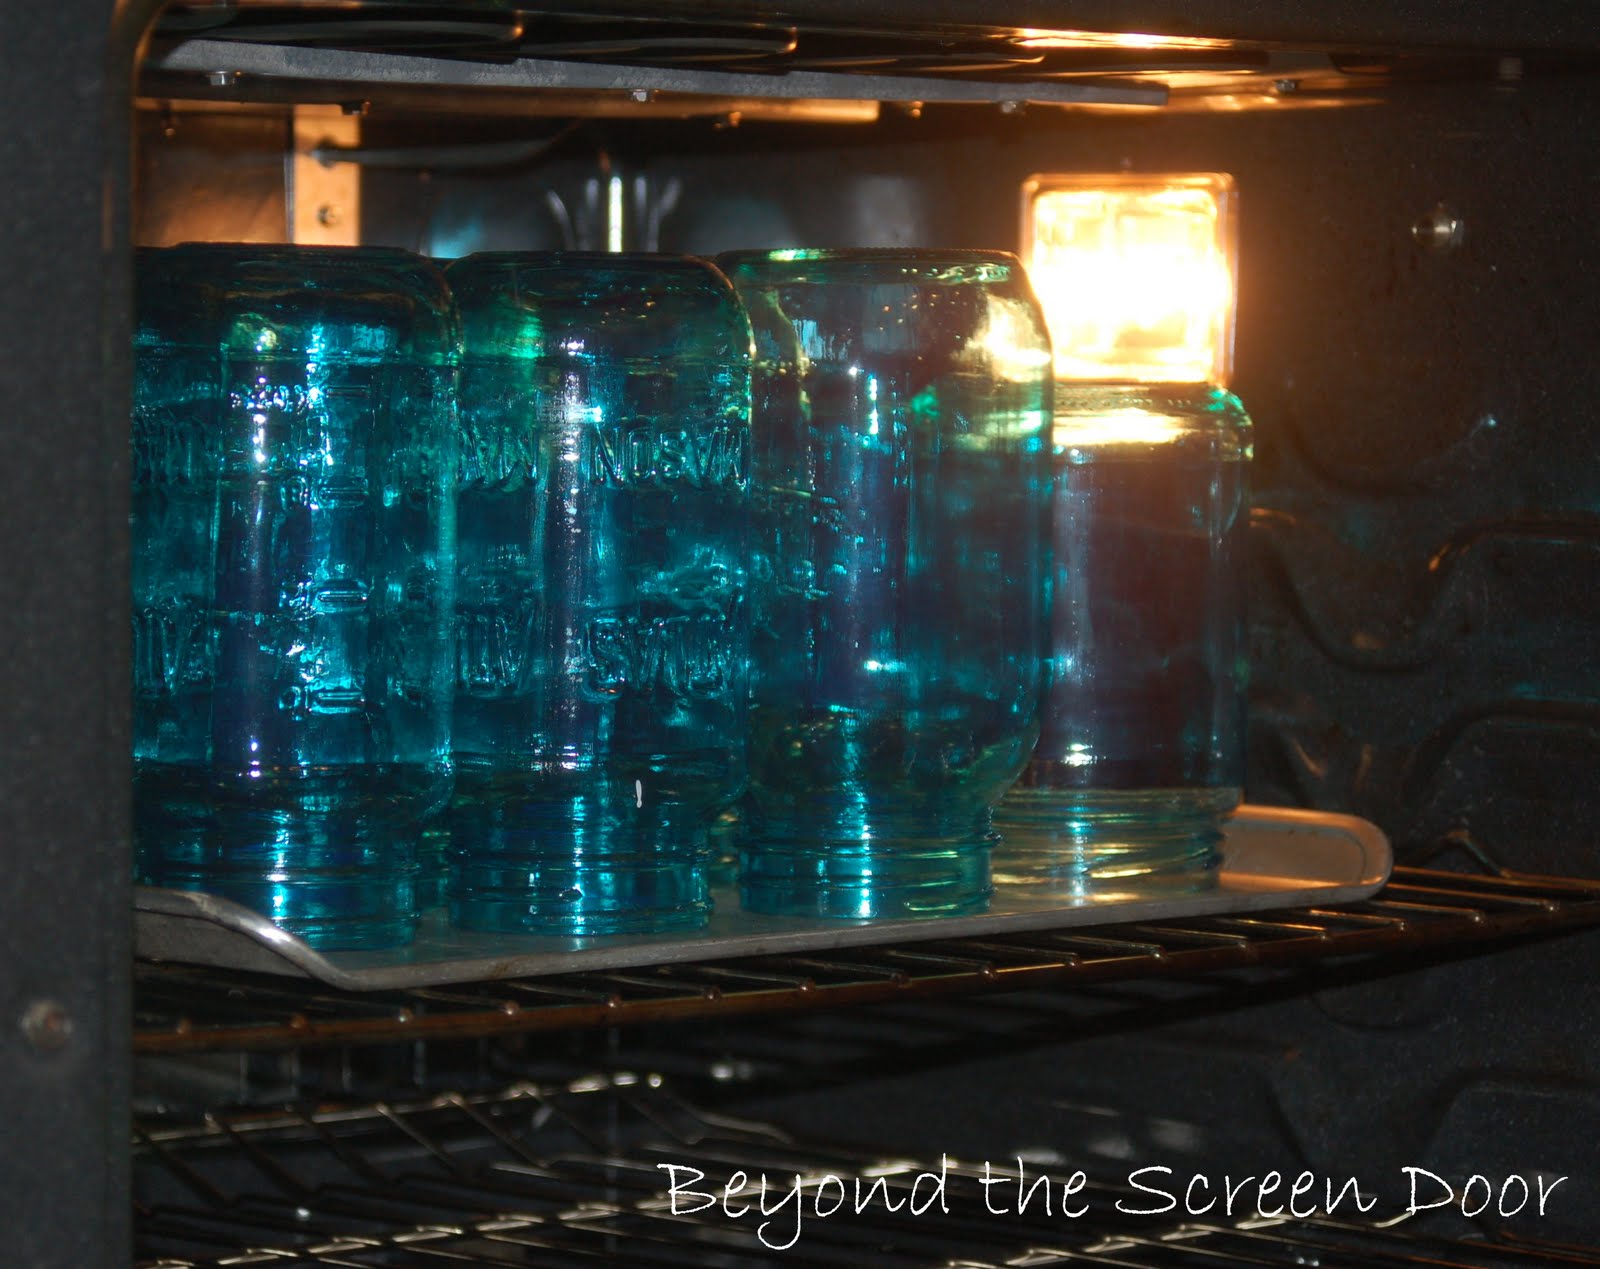
The paint dries to the touch very quickly. 24 hours later the jars are baked for 40 min at 375 degrees.
What are we doing with these beautifully painted jars, you ask? That, my dear friends, is a post for another day! After the wedding, of course!
Wedding Countdown: 13 days!
SHARING WITH:


Oh my goodness! I love those. I saw some at a store around here for crazy numbers (although they had the original zinc lids). I might have to try this one.
ReplyDeleteThose look great!!!!!!
ReplyDeleteI never would have thought of that, Sonya! It is such a pretty blue, too. I'm looking forward to seeing what you do with them. Oh my gosh, less than 2 weeks away now! You must be excited and nervous at the same time. I'll be thinking of you! : )
ReplyDeleteOh my, that is very cool. They came out great!
ReplyDeleteI've seen this done different ways. This way looks the best from a durability standpoint. Speaking for myself: The problem with being a DIYer is sometimes there are just too many great projects out there, so it's hard to narrow them down. While you've been painting, I've been gluing, etc. Hugs!
ReplyDeleteThis is a GREAT project! Love the jars
ReplyDeleteThat is amazing! I can't wait to see the finished project.
ReplyDeleteThey turned out pretty, Sonya! I can't wait to see what you're doing with them.
ReplyDeletehave a wonderful day~L
How super cool! I can only imagine how you are going to use these in some fantastic and gorgeous way. What an exciting time for you all! :-)
ReplyDeleteVanessa
Just beautiful! I would never have thought of this. Can't wait to see how they will be used. I know it's all going to be beyond beautiful!
ReplyDeleteSending you lots of energy, strength and positive vibes.
xo
Pat
These are very cute...finally a project I think I could handle. :)
ReplyDeleteYou clever girl! They look fabulous!
ReplyDeletewhoot whoot..way to cut costs. I can't wait to see it all come together. I know it is going to be spectacular!~
ReplyDeleteGreetings, Sonya, my friend! I saw how to do this a while ago online, and have ALWAYS wanted to try it. YOURS look FANTASTIC! Oh, I have an idea what you will do, and I think it is going to look HEAVENLY! Wow... 13 days left for the wedding?? Have fun (and stay CALM!) for these last wonderful, memorable days leading up to the big day! God bless, good luck and much happiness!
ReplyDeleteBest,
Gloria
What a great idea! Thanks for sharing - these look wonderful!
ReplyDeleteSo perfect, there was no way you could have found and then purchased the old ones. Way expensive, great solution.
ReplyDeleteThese looks fantastic Sonya!! I have to put in my idea folder!
ReplyDeleteI am bookmarking this post - I can't wait to try this! Thanks for sharing at Fireflies and JellyBeans
ReplyDeleteooooo I like! They turned out great! I'd love for you to come link up at DIY Thrifty Thursday at http://thrifty101.blogspot.com/2011/05/diy-thrifty-thursday-16.html
ReplyDeleteMichelle
So pretty! Thanks so much for sharing! I definitely want to try this out myself.
ReplyDeleteYou are a very clever lady, I'm bookmarking this post. I don't have a wedding to do, but it is inspiring...maybe in the garden...ummmmm.
ReplyDeleteHi Sonja~ Your blue jars are just fantastic- thanks for sharing how to make them too! Less than 2 weeks until the wedding?!?! Oh My goodness~ How exciting! Thanks for sharing at my party this week :)
ReplyDeleteWow, girly, I LOVE that... turned out wonderfully. I didn't know you could do that. Thank you.
ReplyDeleteYour jars look amazing, way to go! Best of luck on the big day...
ReplyDelete