Now, for a few details on the construction of the poof-top panels I shared with you in my last post.


Remember, this bedroom is still under construction! Hence the lovely blue painters tape.
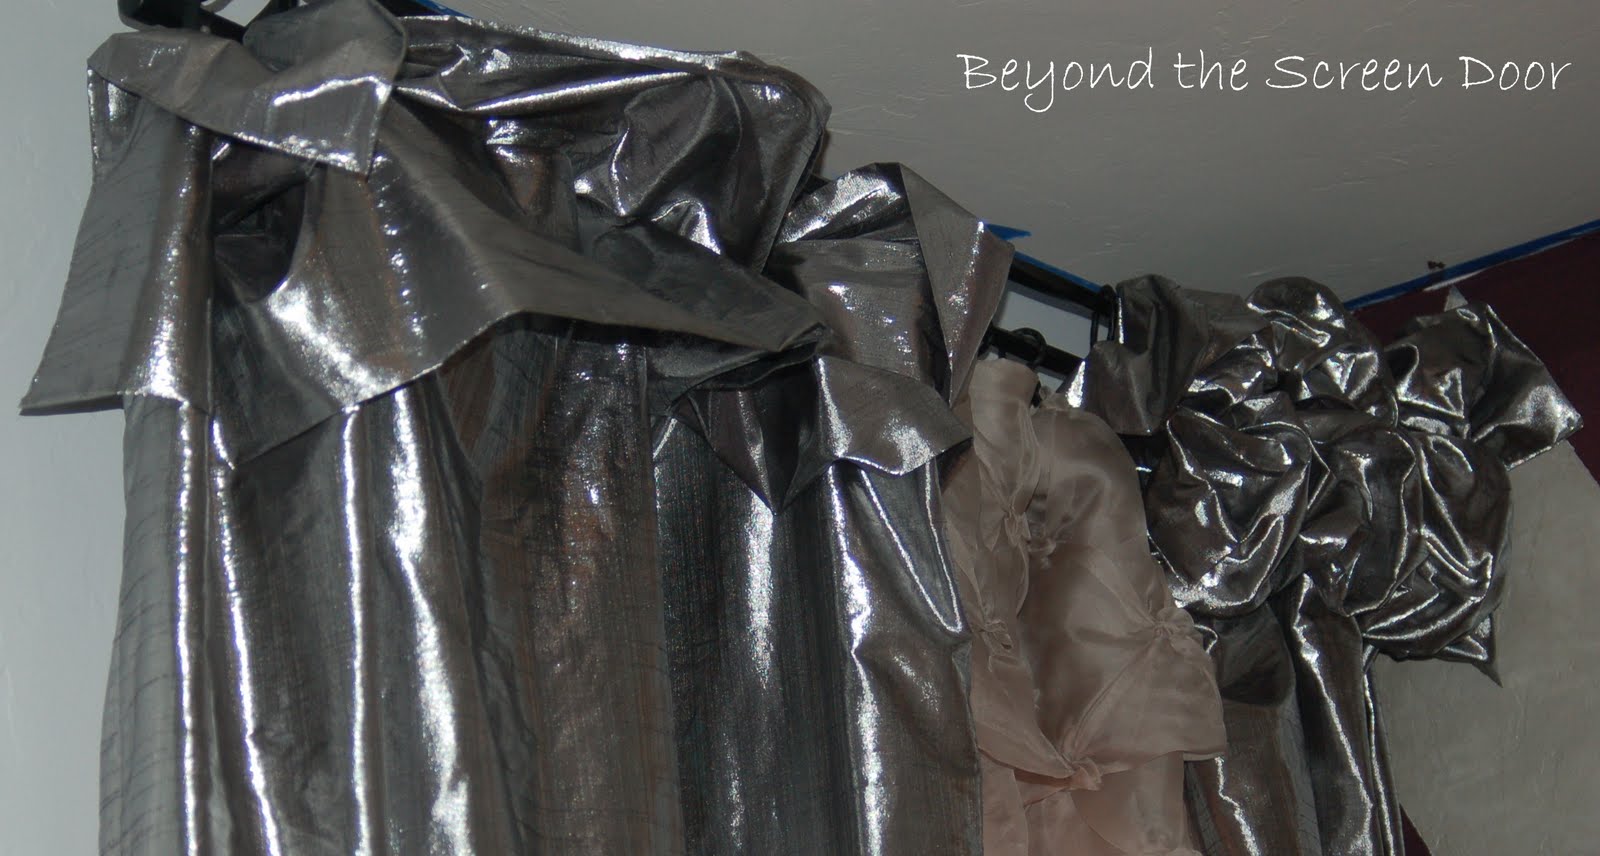
So many of you have asked how to create the look of the poof-top. The key element to this style is the type of fabric used. The fabric must have "body". Such as a silk, or silk blend or in this case, a metallic. The poofs require body to hold their shape. This style can certainly be made from other fabrics (which I have done) but the poofs may droop over time.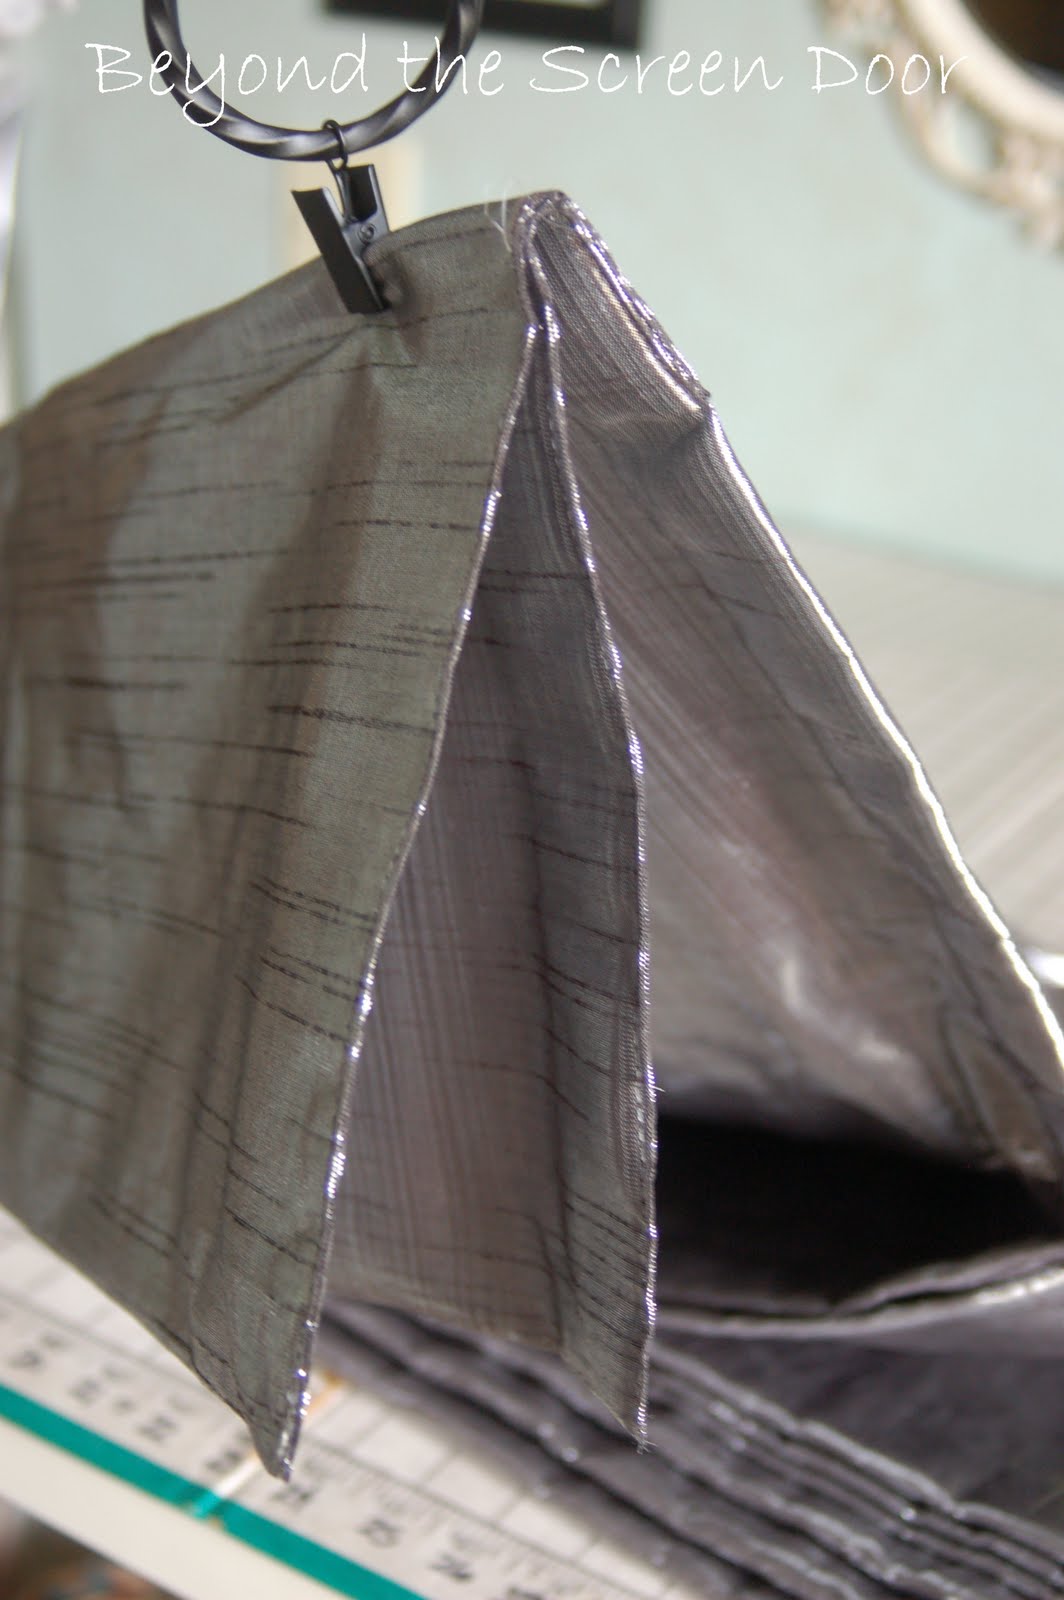

Once the rings are attached you can begin the poofing. This is achieved by separating each flap or pulling it apart. This takes a bit of time and patience. Pull the flaps apart, scrunch and bunch (it's a very scientific process) until you get the look you like. Above, you can see the right side is mostly poofed while the left is not.

Tuck the ends or corners of each flap under to help achieve the poofed look.
The sheers are two panels, each approx 50" wide, made with a 10" flap at the top. The lined, metallic panels are also approximately 50" wide.
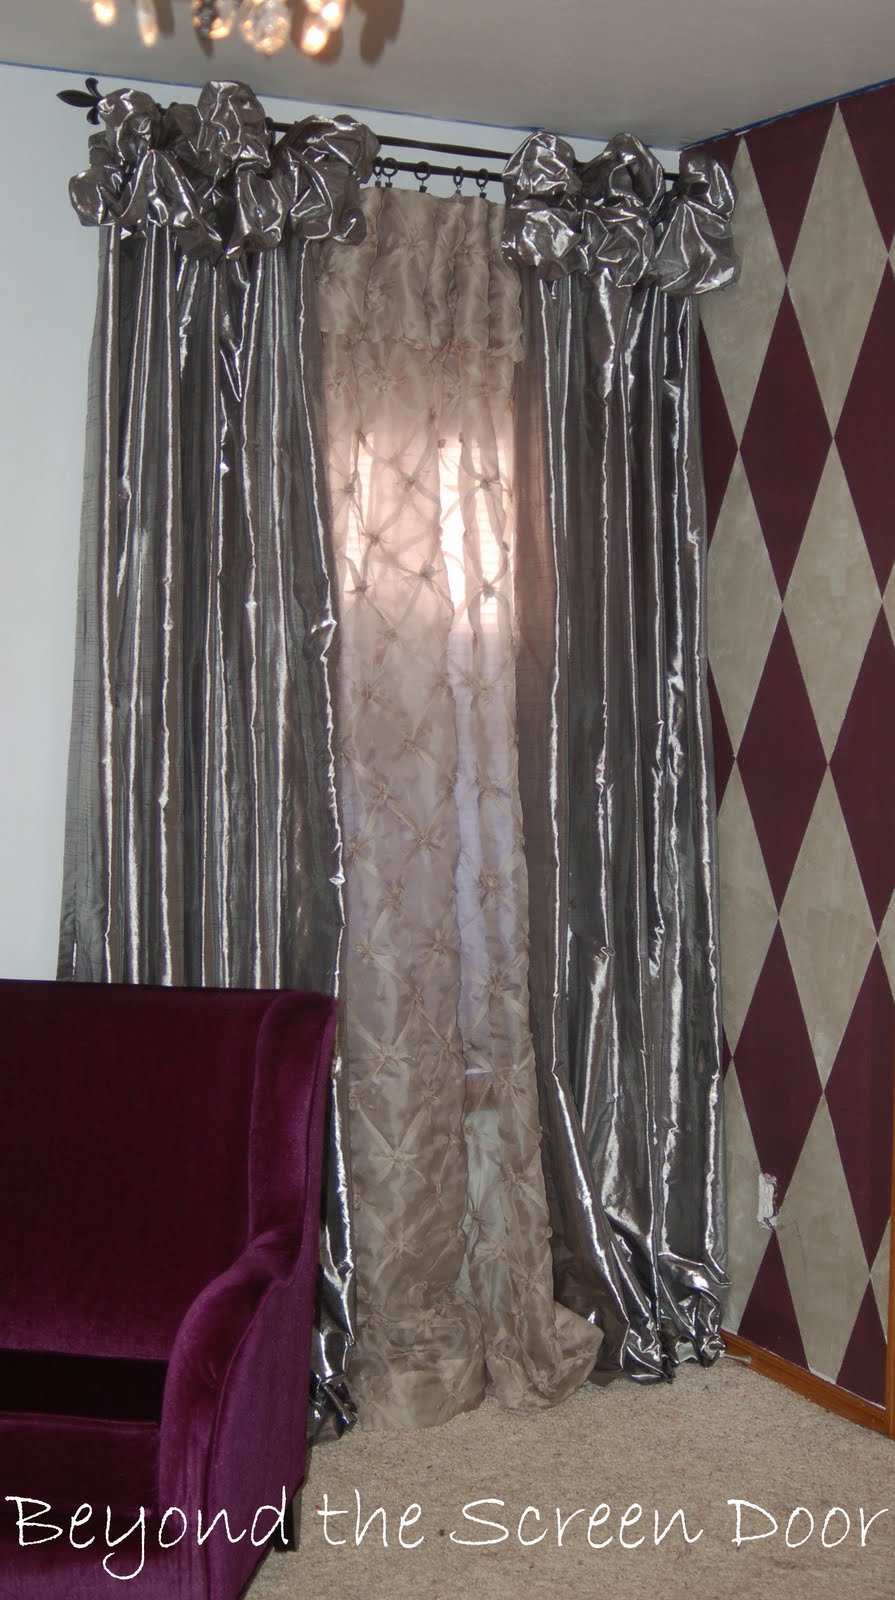
Here's an interesting note. See the cute fleur-de-lis finial on the left side? You may (or may not) have noticed we did not use a finial on the right side. Due to the placement of the window so close to the corner of the room, we chose to hang the panels flush against the wall.
In cases like this, it is absolutely okay to forgo the second finial. (You'd be surprised just how many times this is necessary.) I know this concept is a hard one for some of us symmetrical people. But believe me...once your window treatments are up, it will hardly be noticeable at all! Especially with this poof style of window treatment!
I hope this helps take away some of the mystery surrounding the poof style winow treatments!
I'd love to know if this style is on anyone's to-do list!

I love using clip rings. What a pretty treatment and great way to get that look.
ReplyDeleteGreat instructions, Sonya! I've done the poof treatment in my own house over the years. I'm glad you mentioned the finial on the rod. I'm okay with doing that myself {because as you say, sometimes you have no choice because of where the window sits} and it takes some convincing when I tell clients it's okay to do it. They are usually fine with it once everything is up and done, but they always need to be convinced by seeing it!
ReplyDeleteThanks so much for the detailed instructions! I think I could even do this. :-) Seriously, this is something I am considering.
ReplyDeletexo
Pat
This was a great tutorial Sonya! And I have left the finial off of a curtain rod too in order to get the look I wanted. Great tips all around! :-)
ReplyDeleteVanessa
Such a clever way to do these curtains! They look so regal and luxurious.
ReplyDeleteI'm starting a linky party on Mondays for my "Make a List Mondays". It doesn't have to be on Mondays, just beginning of the week. Would love it if you could join! :)
Crystal
Thanks so much for the excellent tutorial. Have seen these in magazines but wasn't sure of the construction. I will be making these in the near future. Linda
ReplyDelete