
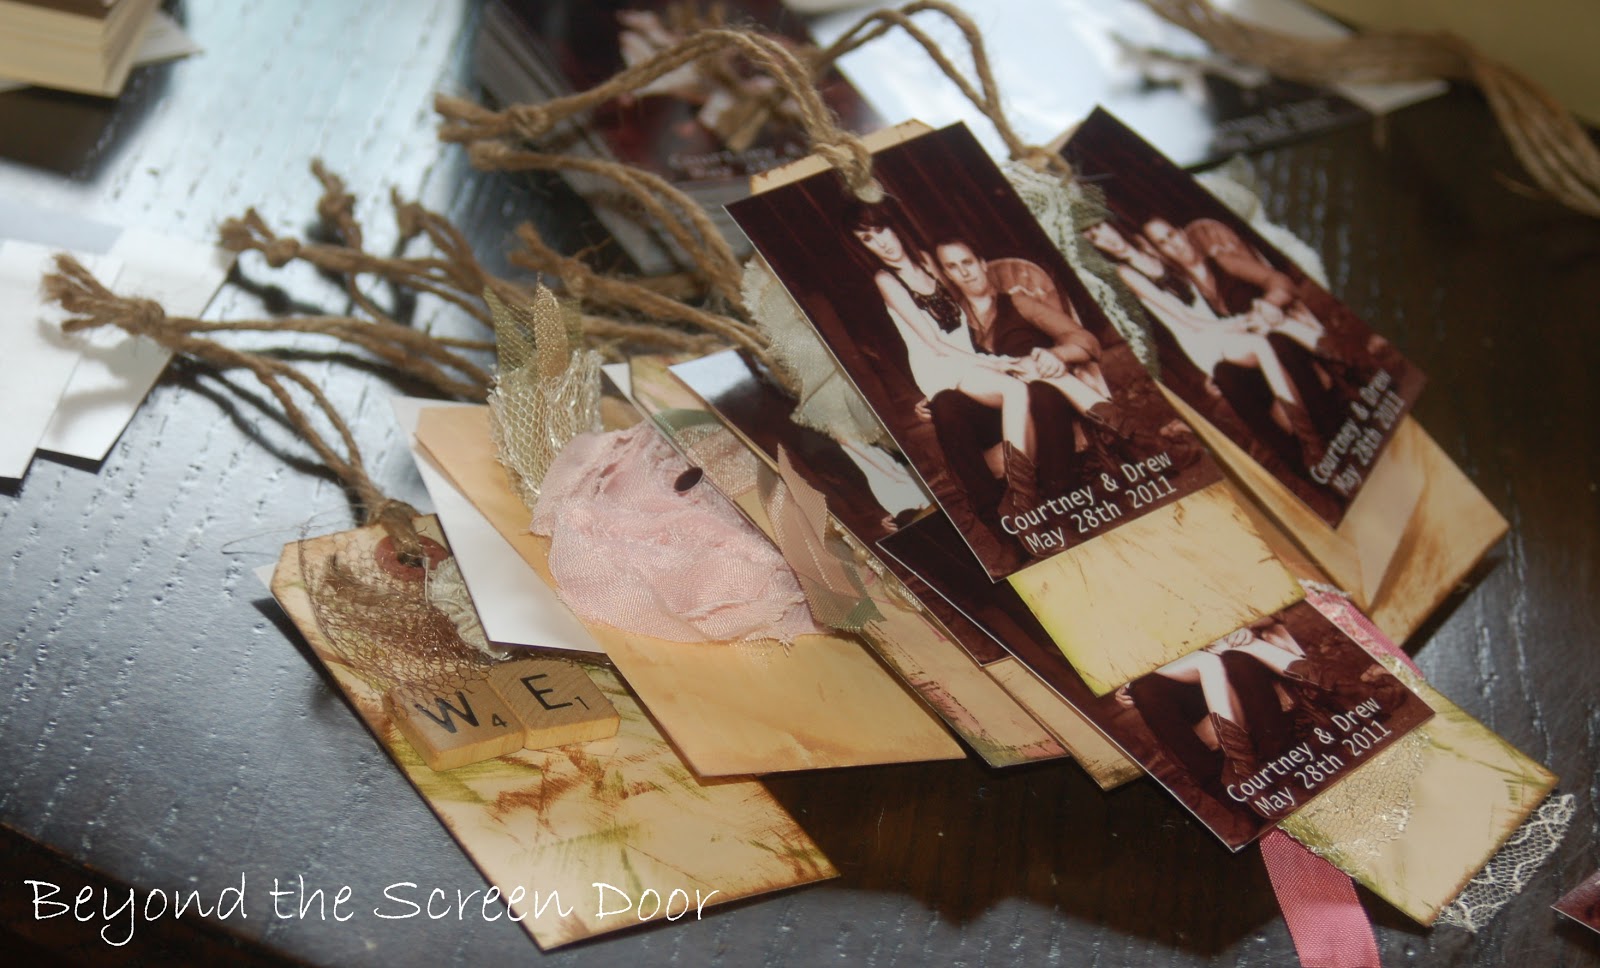
One of the most time consuming, yet fun and rewarding, things created for the wedding were the Guest Tags/Wedding Favors.
The plan was for each guest attending the wedding to have their own personalized wedding favor. Courtney was so hoping to have a seating arrangement for the guests and the number which would correspond with their table would be on each tag. This was more easily accomplished in thought than in deed, so we decided to make them as wedding favors.

Photo by Clayton Austin
We had such fun putting these together. Many, many hours, numerous few friends and family (Thank you, Thank you!), lots of laughs and hot-glue-burned fingers went into creating these 200 individually unique guest tags.

When Courtney came across a similar idea she knew she wanted to incorporate this into the wedding.
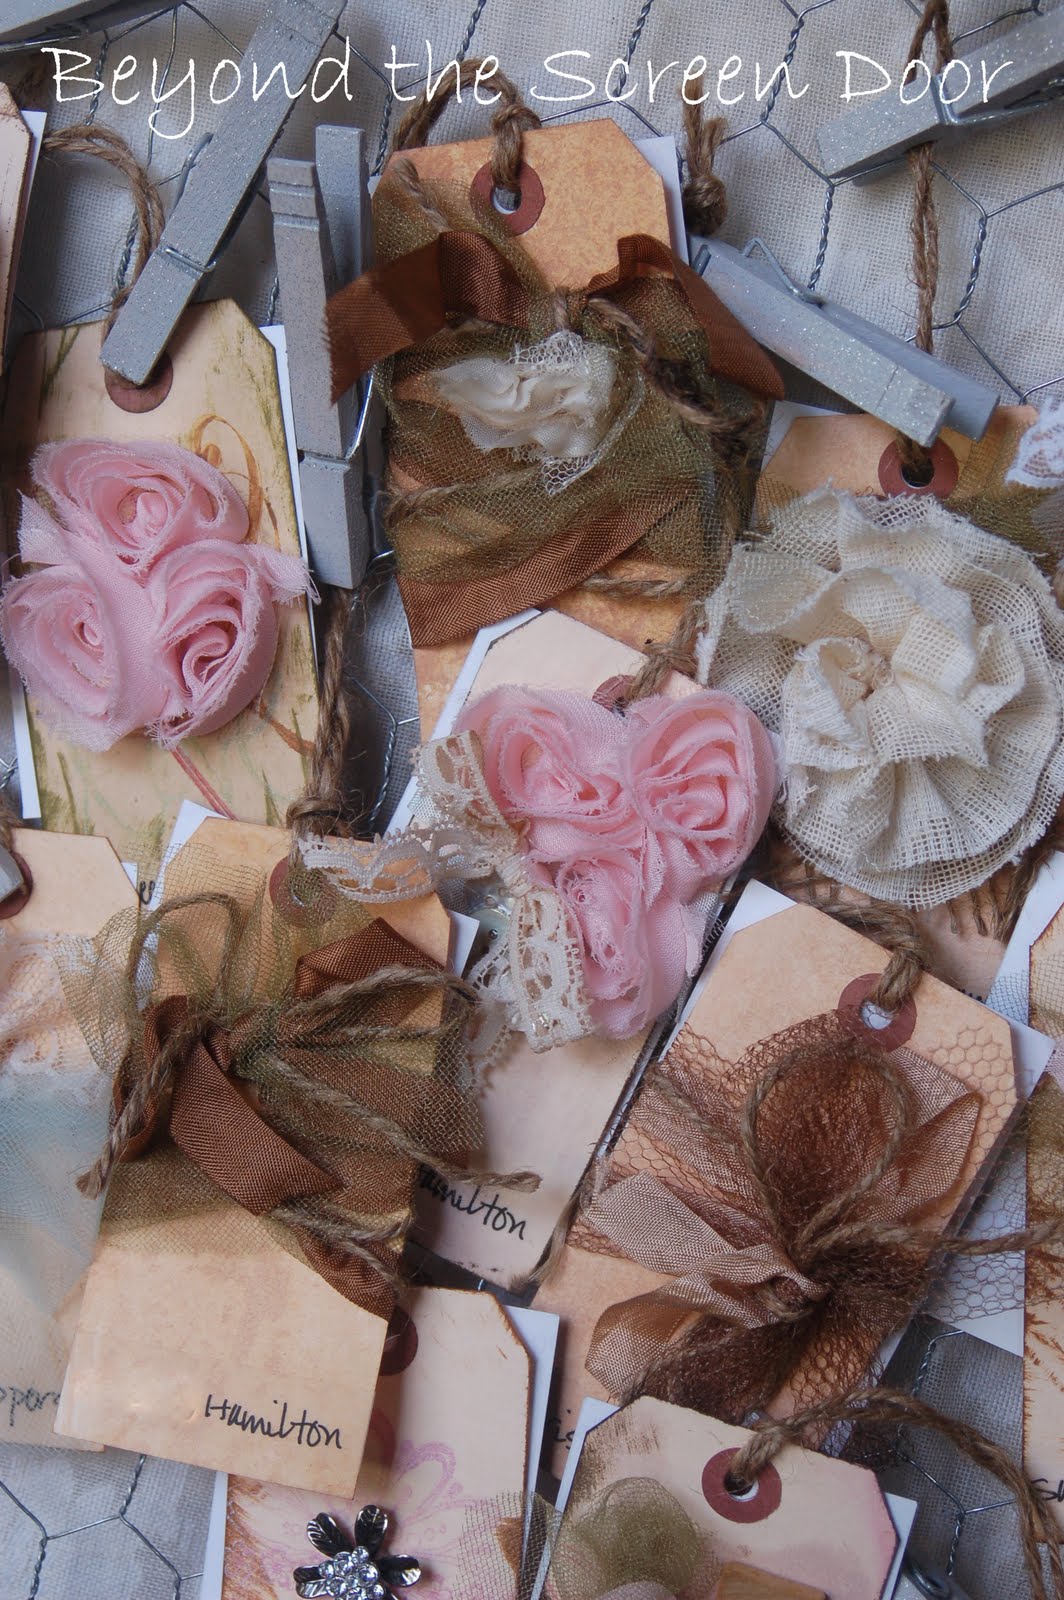
We started by ordering 1000 Manila shipping tags (2 3/8" x 4 3/4") from ULINE Shipping Supply. Each tag was then aged or distressed using several different methods.
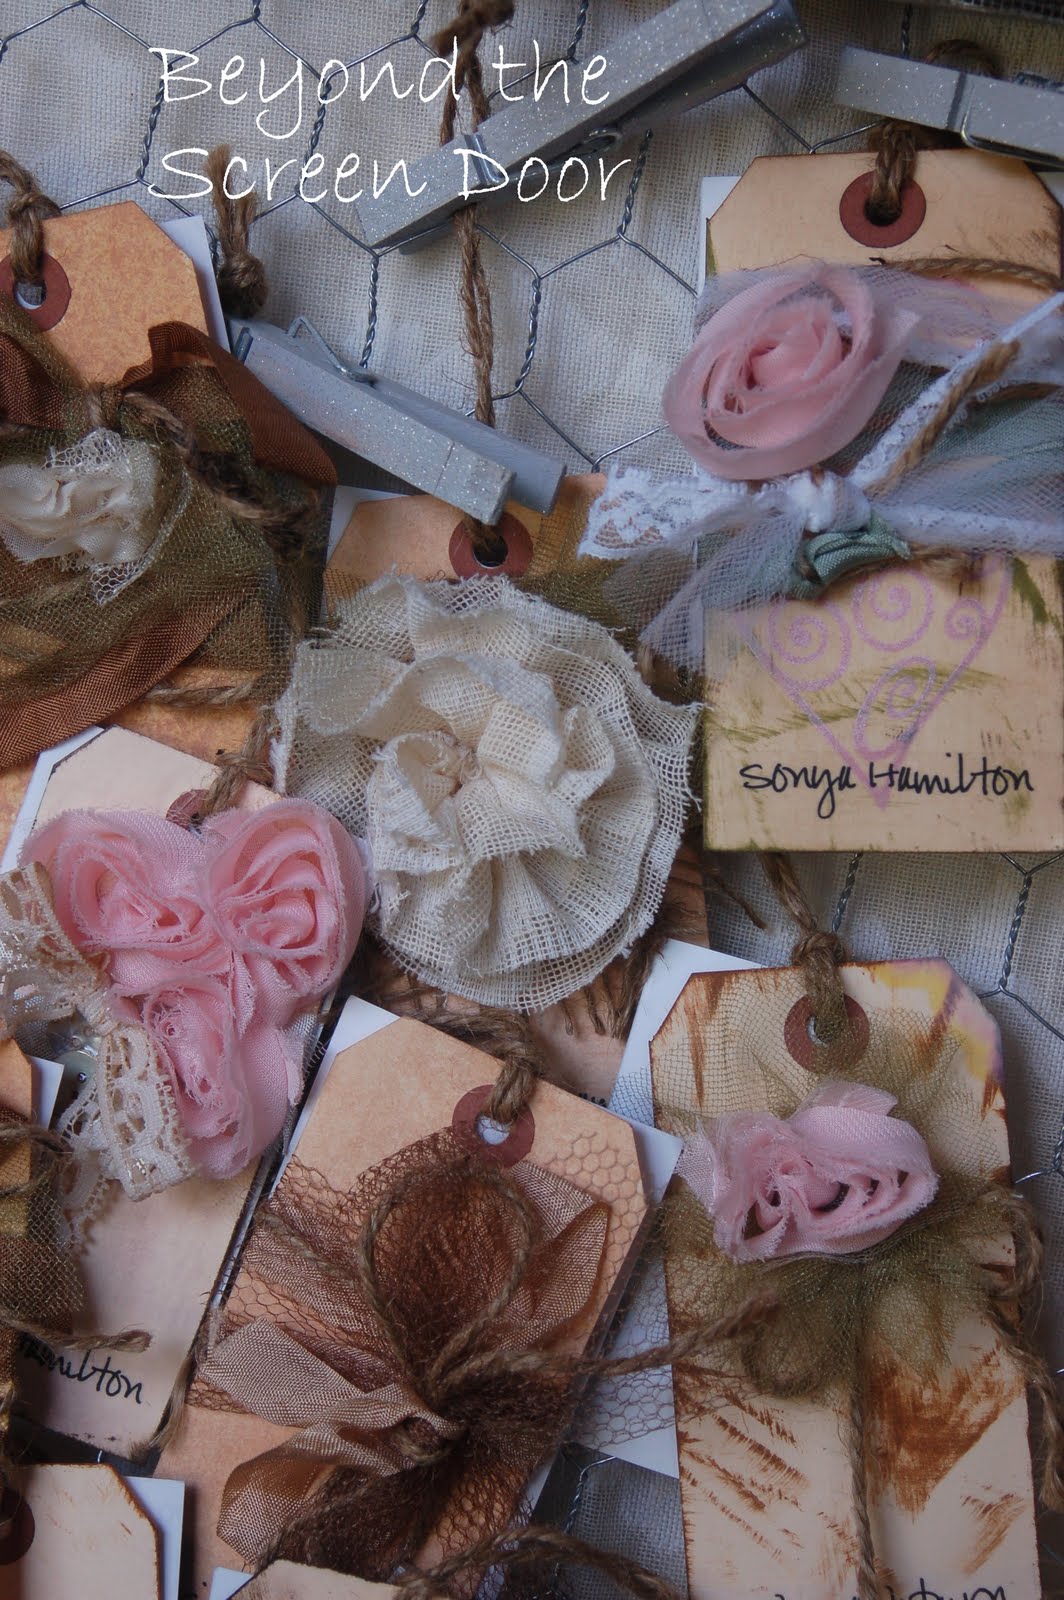
Each tag received some sort of design created and attached to the front. Items used were scrabble letters (purchased from an Etsy store), scraps of lace and fabric fashioned into flowers, ink stamps, ribbon flowers, buttons, tulle, netting, jute and ribbon. (The ribbon we used was Hug Snug seam binding from zipperstop.com. Love this stuff!)

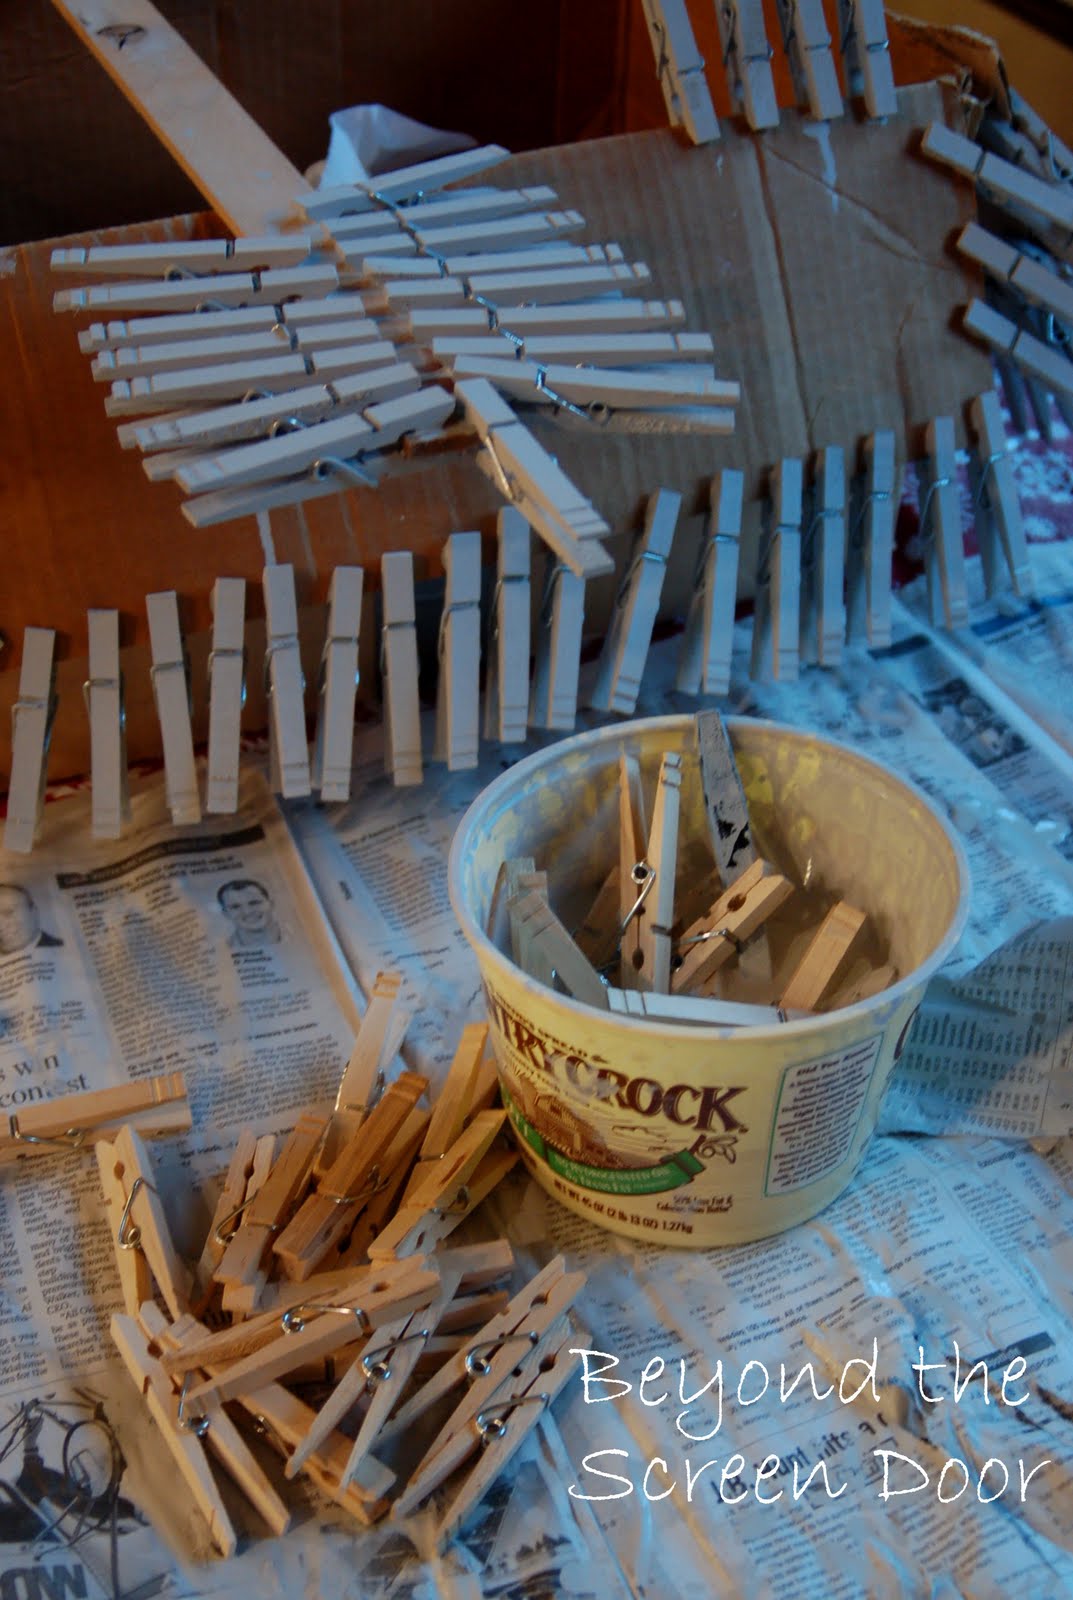
200 wooden clothespins (Wal-Mart) were then painted and glittered! I figured the easiest way to accomplish this was by giving them all a paint bath in a mixture of gray latex paint and water. (approx 3/4 paint to 1/4 water) I then clipped then to whatever I could find while they dried. After drying, they all got a coat of spray glitter to add a bit of sparkle.

The burlap ribbon used on these items came from Michaels. The colors of Hug Snug ribbon used were Lyric Rose, Walnut, Mushroom, Charcoal Grey, Mode Green (a gray/blue/green) and Moss Green (a bright green).
Because, as Courtney will tell you, the right font can make or break a project :) we printed each guest's name on clear address labels, cut and attached them to each tag. We were able to get three names per address label.
These turned out to be such a sweet addition to the wedding, as well as being lots of fun to make!
EDIT: I took some additional pictures of the wedding favors that were for my family or leftover from the wedding. Hope this helps to see the details.

SHARING WITH:


Very cute idea here! A lot of love went into this wedding.
ReplyDeleteA lot of love went into this wedding!
ReplyDeleteWow these are beautiful! How special!
ReplyDeleteWhat an artistic favor. I can see where this would be very time consuming, yet fun! I had to go look up all of the colors at Zipperstop to see what you used. It sounds like you have enough supplies for at least a couple more weddings. My son is like Courtney with the whole font thing. He's terribly disappointed that I used Papyrus for the programs :P. I would have liked to have seen a few more of them up close and personal, but that's just me whining. These photos are beautiful! Hugs, Kim
ReplyDeleteThe tags are beautiful - and how sweet that you put so much time and energy into making this wedding unique qnd personal.
ReplyDeleteI can't even imagine doing that many tags/favors, Sonya! They look fantastic and I love how they are personalized. I have to agree with Courtney - the right font can make or break a project! : )
ReplyDeleteThose are so pretty. I bet they took a zillion hours.
ReplyDeleteWhat a cute and clever idea! :)
ReplyDeleteCrystal
This is such a sweet and personal favor! I know your guests were thrilled to get it, especially with their beautiful photo on it. Great project! Thanks for sharing the how-to.:)
ReplyDeleteLOVE my guest tag/favor! So, so pretty! I have it on my kitchen bulletin board so I can admire it often. :)
ReplyDeleteLove this cute idea! Yes, a lot of love did go into this wedding and it shows!
ReplyDeleteWow. What a creative idea. So pretty.
ReplyDeleteI can only imagine how many hours it took to create these lovely favors/tags. Such a sweet, personalized favor. I can imagine the guests loving these.
Thank you, Sonya, for sharing the photos of the special day with us.
have a happy Wednesday~L
Wow!! This project absolutely amazes me!! You did such a great job! I love the detail and thought you put into each favor! That is a very special memory that each of your guests can take home!
ReplyDeleteThis is my first time coming across your blog, and i'll have to say i'm hooked!!
-your newest follower!! :)
Oh I am hitting a big "LIKE" button on this post. :)
ReplyDeleteSweet treats indeed!
Just beautiful! What a labor of love -- I'm sure everyone appreciated (at least I HOPE they did!) all of your efforts!
ReplyDeleteThese are really amazing! I love it!
ReplyDeleteThese are so cute...what a fanciful addition to the wedding. Although it looks like a lot of work. THanks for linking up to Mod Mix Monday!
ReplyDeleteI totally love these! Oh where was this idea almost 10 years ago when I got married???
ReplyDeleteBrilliant! :)
SO so cute!
ReplyDeleteI would like to see EACH one pleeease!!!
Those are great, such an original idea for the guest and it will mean so much to them.
ReplyDeleteBut there is no way they can ever imagine all the work it took to do the zillion you did.
Congrats.
Kathy
Fabulous!!
ReplyDelete